Home

You’re Doing That Wrong is a journal of various successes and failures by Dan Sturm.

Open Last QuickTime File Macro

Yesterday, Dr. Drang had a nice post about creating a keyboard shortcut for the Open Recent menu item in BBEdit using Keyboard Maestro. I purchased Keyboard Maestro a few months ago and have been meaning to find some time to play with it. I’ve also been meaning to find a way to open the most recently viewed video in QuickTime with a global keyboard shortcut. Let’s skip right to the punchline.

KM_Macro_Cropped.png

Throughout the course of a project, I spend a lot of time referring to the most recent cut of a video alongside notes from the client. Once I know the next shot or note I’m going to address, I close the cut, my notes, and get to it. Since my notes live in nvALT, they disappear and reappear with a quick ⌃Z. Now, no matter what I’m doing, I can quickly summon the video file with a keyboard shortcut as well.

A simple tool that removes way more friction that you’d probably guess. It’s a good thing.

Managing Disk Cache (with a Hammer)

Throughout the course of a given project, I use a handful of applications to complete my work. At the moment, I edit in Avid MediaComposer and Final Cut Pro 7. I do my VFX work in NukeX. I review shots and conform sequences in Hiero. And I do final color correction in AfterEffects with Red Giant Colorista II. There’s an obvious advantage to using the right tool for the task at hand, but there’s a caveat that I almost never remember until it smacks me right in the face: disk space.

I’m not talking about the space required for digital negatives, plates, renders, or project files. No, the piece I always manage to forget is the massive disk cache each application in my workflow creates on my startup disk [1]. With single frames of a sequence ranging between 5 and 30Mb, and individual shot versions reaching well into double digits, disk cache can take up a ton of space. And since cache files are created whenever an element is changed and viewed, it’s not an easy task to estimate how much space will be used by a project ahead of time.

Most applications, including every application I use, have built in preferences designed to limit the size of the disk cache. Most also feature a big button labeled “Clear Disk Cache”. These preferences are great if you spend all your time in a single application, but are of little consolation when you’re halfway through previewing a shot in Nuke and OS X pops up telling you your startup disk is full. Once you’re in that sad, embarrassing moment, good luck getting AfterEffects to open so you can hit that “Clear Cache” button.

“To the Finder,” you say? Even if the Finder were responsive when your startup disk had less than 50Mb of free space, are you the kind of person that keeps a sticky note on your monitor listing the paths to all the buried, hidden cache folders for each application? Neither am I.

Historically, I’ve gone straight to my project’s Renders folder and deleted my 2 oldest exports, giving me about 6Gb of breathing room to go hunt down the various disk hogs. Not a great solution. What would be ideal is the ability to hit one keyboard shortcut, see a list of which applications are taking up space and, more importantly, how much space, then quickly purging the unnecessary files.

Normally, the sizes for AfterEffects, Nuke, and Hiero are in the double digits of Gigabytes. This screenshot was taken after using the script as intended.

The Script

cache.command:

#!/bin/sh  

clear  
echo Current Cache Size:  
echo      
du -c -h -s "/Users/dansturm/Library/Preferences/Adobe/After Effects/11.0/Adobe After Effects Disk Cache - Dan’s MacBook Pro.noindex/" "/var/tmp/nuke-u501/" "/var/tmp/hiero/" "/Avid MediaFiles/MXF/" "/Users/dansturm/Documents/Final Cut Pro Documents"  

echo      
read -p "Purge Cache files?(y/n) " -n 1 -r  
echo      
if [[ $REPLY =~ ^[Yy]$ ]]  
then
    rm -r "/Users/dansturm/Library/Preferences/Adobe/After Effects/11.0/Adobe After Effects Disk Cache - Dan’s MacBook Pro.noindex/"*
    rm -r "/var/tmp/nuke-u501/"*
    rm -r "/var/tmp/hiero/"*
    echo    
    echo Done!
    echo      
fi  

The script displays the space taken up by each application, the path to that cache folder, and a total of space used. It then prompts for a y/n input to delete the cache files.

Since managing Avid and Final Cut Pro media requires a bit more attention and nuance than a dumb hammer like this can provide, their disk usage is listed, but their files are not removed. If you modify the script to delete Avid of FCP media, allow me to preemptively say “I told you so” when your project becomes corrupted.

Details

I run the script with a FastScripts keyboard shortcut. I wanted to shortcut to open a new Terminal window to display the information, so the keybaord shortcut actually calls a second short script called cache.sh which takes care of that part:

#!/bin/sh  

chmod +x /Path/To/cache.command; open /Path/To/cache.command  

The paths for the cache folders are hard coded into the main script and, as I mentioned, not all items listed are deleted. I like to see as much information as possible, but manage the deletion list more carefully.

For me, the main offenders of disk cache consumption are AfterEffects and Nuke which, together, average nearly 200Gb of disk usage. Once I’ve dealt with those 2 applications, I don’t usually need to go hunting for more free space.

Next time I accidentally inevitably fill up my startup disk with cache files, it’ll take seconds to rectify, rather than a half hour of excruciatingly slow, manual effort.

Hooray for automation!


  1. While it’s true that, in almost every application, you can re-map the disk cache folder to any disk of your choice, the entire point of a disk cache is to have the fastest read/write speeds possible, and no disk I own is faster than my rMBP’s internal SSD.  ↩

r_ScreenComp ToolSet for Nuke

In my previous post, I said I created QuickGrade so I could quickly balance my Log footage and start compositing more quickly. Based on the footage in the accompanying screenshot, you could probably guess what came next; replacing the screen on the device.

Creating a successful screen comp isn’t rocket science, but since it’s a very (very) common compositing task and, in many cases, the entire focus of a commercial, any tool that helps you work more quickly, while maintaining quality, is worth it’s weight in met-deadlines.

In uncharacteristic fashion, I’ll turn this post over to myself in video form to explain further.

There’s no chance I could have finished the number of shots I was assigned, in the time I had allotted, if it weren’t for this ToolSet. If you do a lot of screen comps in your day-to-day, even if you don’t use my ToolSet [1], I cannot recommend highly enough that you automate as much of the process as possible.

Download


  1. Installing a Nuke ToolSet is as easy as dropping the R_ScreenComp.nk file into \.nuke\ToolSets\  ↩

QuickGrade Tool For Nuke

Lately, I’ve been doing a lot of VFX work with Alexa Log-C footage. Compositing with Log footage generally requires a Viewer LUT so you can actually see what you’re doing. I don’t like using LUT files because they’re fixed color transformations and usually need to be supplemented with additional color tools on a per-shot basis. While I was working, I found myself repeatedly creating the same “custom viewer LUT” setup, so I decided to make it a dedicated tool called QuickGrade.

QuickGrade default parameters.

QuickGrade isn’t really intended to be a creative color tool, it’s built to quickly balance your footage and make it look “correct”. I decided which controls were relevant by noticing that nearly all Alexa Log-C footage I encountered required the same adjustments:

  • Contrast: Obviously. It’s built to be flat.
  • Exposure: After yanking on the contrast, it usually needs an exposure adjustment.
  • Saturation: It’s not inherently overly desaturated, but it benefits from a boost.
  • Green-cast: Alexa Log-C footage typically needs a healthy amount of “de-greening”.

For added flexibility, I also included controls for White Balance, Black Point, and White Point. The controls in the top half of the node are for luminance, and the bottom half for color. Quick and simple.

Workflow

Typically, I drop this node into the Node Graph above the Read node, unconnected, and set it as the Viewer Input Process [1], but it works just as well when used like any other color correction tool.

QuickGrade used as an Input Process.

Not A Gizmo

QuickGrade is a ToolSet for Nuke, not a Gizmo. ToolSets are easier to install than Gizmos, they show up in your toolbar without needing to write any Python code, and they’re easier to modify later if you feel the need. Since the whole idea behind creating this tool was ease of use and speed, the easy, lazy, ToolSet won out over the less easy Gizmo.

To install a Toolset in Nuke, just navigate to your .nuke directory. In there will be a folder called ToolSets. Unzip the QuickGrade.nk file, drop it inside, and you’re done.

Update: 2015-08-21

Okay, so I changed my mind about the whole Gizmo thing. Gizmos, unlike ToolSets, automatically open their properties panes when added to the node graph, which is great. So, now you can choose from either option below.


Download: Nuke Gizmo


  1. Using a node (or group of nodes) as a Viewer Input Process is as easy as right-clicking on the node, selecting Edit\Node\Use as Input Process. Bam.

My Custom Nuke Defaults

After a few busy months of post work, I finally found a few days to reevaluate and improve my workflows and system preferences. Since I spend a majority of my time in NukeX, that’s where I decided to start.

I’ve got some new custom tools I built recently that I’ll share with you soon enough, but first things first, Nuke’s default state needed a little adjusting. Here are the items I added to my init.py [1] file that save me tons of time and headache.

init.py:

# Project Settings > Default format: HD 1920x1080  
nuke.knobDefault("Root.format", "HD")  

# Viewer Settings > Optimize viewer during playback: on  
nuke.knobDefault("Viewer.freezeGuiWhenPlayBack", "1")  

# Write > Default for EXR files: 16bit Half, No Compression  
nuke.knobDefault("Write.exr.compression","0")  

# Exposure Tool > Use stops instead of densities  
nuke.knobDefault("EXPTool.mode", "0")  

# Text > Default font: Helvetica Regular (in Dropbox folder)  
nuke.knobDefault("Text.font",   "/Path/to/Dropbox/fonts/HelveticaRegular.   ttf")  

# StickyNote > default text size: 40pt  
nuke.knobDefault("StickyNote.note_font_size", "40")  

# RotoPaint > Set default tool to brush, set default lifetime for brush and clone to "all frames"  
nuke.knobDefault("RotoPaint.toolbox", "brush {{brush ltt 0} {clone ltt 0}}")  

Explain Yourself

Since I don’t work in feature film VFX, the HD frame size is a no-brainer.

I do a fair amount of motion graphics animation in Nuke, so I often have the Curve Editor open. I’ve always been frustrated that Nuke never seems to be able to achieve realtime playback when looking at curves, so I ended up making adjustments, then switching back to the Node Graph to view my changes. Very annoying. The recently added “Optimize viewer during playback” button was the answer to my realtime problems [2]. Like all of these custom preferences, I use it so often, I want it to be on by default.

I comp almost exclusively in Open EXR image sequences. For me, 16bit Half Float with No Compression is the appropriate balance of file size and quality. By default, the Write node sets compression to Zip (1 scaneline) and it annoys the crap out of me to change it every time.

I love to use the Exposure tool, especially when color-correcting Log footage by hand [3]. But since I’m a filmmaker and a human being, I prefer to adjust exposure in Stops rather than Densities.

I set the Text node to use Helvetica by default and I keep the font in my Dropbox folder to make sure it’s always with me. Why? Because the default is normally Arial and seriously, are you kidding me?

I love using StickyNote nodes to write myself notes as I’m working. But because either my screen resolution is too high or I’m getting old and going blind [4], I always have to crank up the font size to read the damn things.

When I decide to use a RotoPaint node instead of a simple Roto node, it’s because I want to paint something. And more often than not, I want to paint or clone something for the entire duration of the shot, rather than just a single frame. Boom. Default.

What Else?

I would love to set the default feathering falloff in the Roto and RotoPaint nodes to smooth rather than linear, but I haven’t been able to figure out how to make that happen as of yet.

If you’d like to use these preferences in your Nuke setup, simply copy and paste the code into your init.py file in your .nuke directory. If you don’t have an init.py file in there, just open a text editor and make one.

Happy comping.

UPDATE – September 09, 2013, 04:55:04PM

As Joe Rosensteel pointed out on Twitter, another great tip is changing your 3D control type to Maya controls. I’m not a Maya user myself, but nearly all the 3D artists I work with are, and nothing makes them happier to help you out than saying, “Would you like to take stab at it? You know the 3D controls are the same as Maya’s”. And the 3D control type preference is super easy to adjust. It’s part of the GUI in the application preferences pane, under the Viewers tab.


  1. If you were unaware, you can modify Nuke’s default state by creating a file called init.py in your .nuke directory. The application loads your preferences on launch and it’s easy enough to add/remove settings without screwing up your install. More info on page 18 of the Nuke User Guide  ↩

  2. I don’t remember exactly which version introduced it, but it’s the button that looks like a snowflake to the left of the playback controls.  ↩

  3. Yes, I’m familiar with the concept of LUTs.  ↩

  4. Rhetroical.  ↩

Fountain Cheat Sheets Revisited

TL;DR: Click here for an online version of this Fountain Cheat Sheet

Thanks to recent releases of awesome apps like Highland and Slugline, Fountain, the plain text screenwritting syntax, has been getting a lot of attention. As Fountain newcomers are getting up to speed on the syntax, many have been searching for a Fountain cheat sheet for quick reference.

Highland and Slugline both include features that allow you to “just write” without having to think about syntax, but the promise of Fountain is its ability to be used in any application that takes text input. Thus, a quick reference guide may be of some use to recent plain text converts.

A little over a year ago I reproduced the Fountain syntax guide in a Cheaters page. And then I promptly forgot about it. It wasn’t until the release of Highland that I realized why I never used my own cheat sheet; it wasn’t a cheat sheet. It was a complete syntax reference manual; something that’s almost never useful when writing a screenplay.

Highland ships with a beautiful built in Fountain cheat sheet. It’s short, simple and easy to use at a glance. So, naturally, I ported it to Cheaters so I could have it available at all times.[1]

Left: Highland Cheat Sheet, Right: Cheaters Cheat Sheet

If you’d like to use it, here’s the new Fountain cheat sheet and the previously created CSS file. Toss those files into the Cheaters cheatsheets and css folders, respectively, and add the link to the Cheaters app in the index.html file with the line:

<li data-preserve-html-node="true"><a data-preserve-html-node="true" href="cheatsheets/fountain_h.html">Fountain</a></li>

For more information on customization, head over to the Cheaters page on Brett Terpstra’s site. Happy writing and welcome to Fountain!


  1. I even included the “Learn More” link to the full Fountain syntax guide, should the need arise.


Update - 09/05/14

The cheat sheats have been updated with a Forcing Elements section to match the Fountain 1.1 spec.

Intel Fabs Hit the (Really) Big Screen

​Click to see full resolution version.

​Click to see full resolution version.

The Show

Every year Intel® holds a conference for its Sales and Marketing Group known as ISMC. Over the course of several days, attendees get hands on with Intel’s latest products, meet with Engineers, take training classes, and attend keynotes from company executives.

Being the one major face-to-face event each year for the global sales force, the conference is a big to do. For ISMC 2012, Intel Studios [1] was asked to create a video unlike any we had produced before [2].

The Project

One of the recurring keynotes at ISMC is given by the head of the manufacturing division of the company; giving the audience a look at the innovation and engineering behind the products they sell, as well as a glimpse at the company’s roadmap for the coming years.

Presenting for ISMC 2012 was Executive Vice President and Chief Operating Officer Brian Krzanich; one of Intel Studios’ regular customers. Over the years we’ve created a number of products to accompany his presentations, both internally and externally.

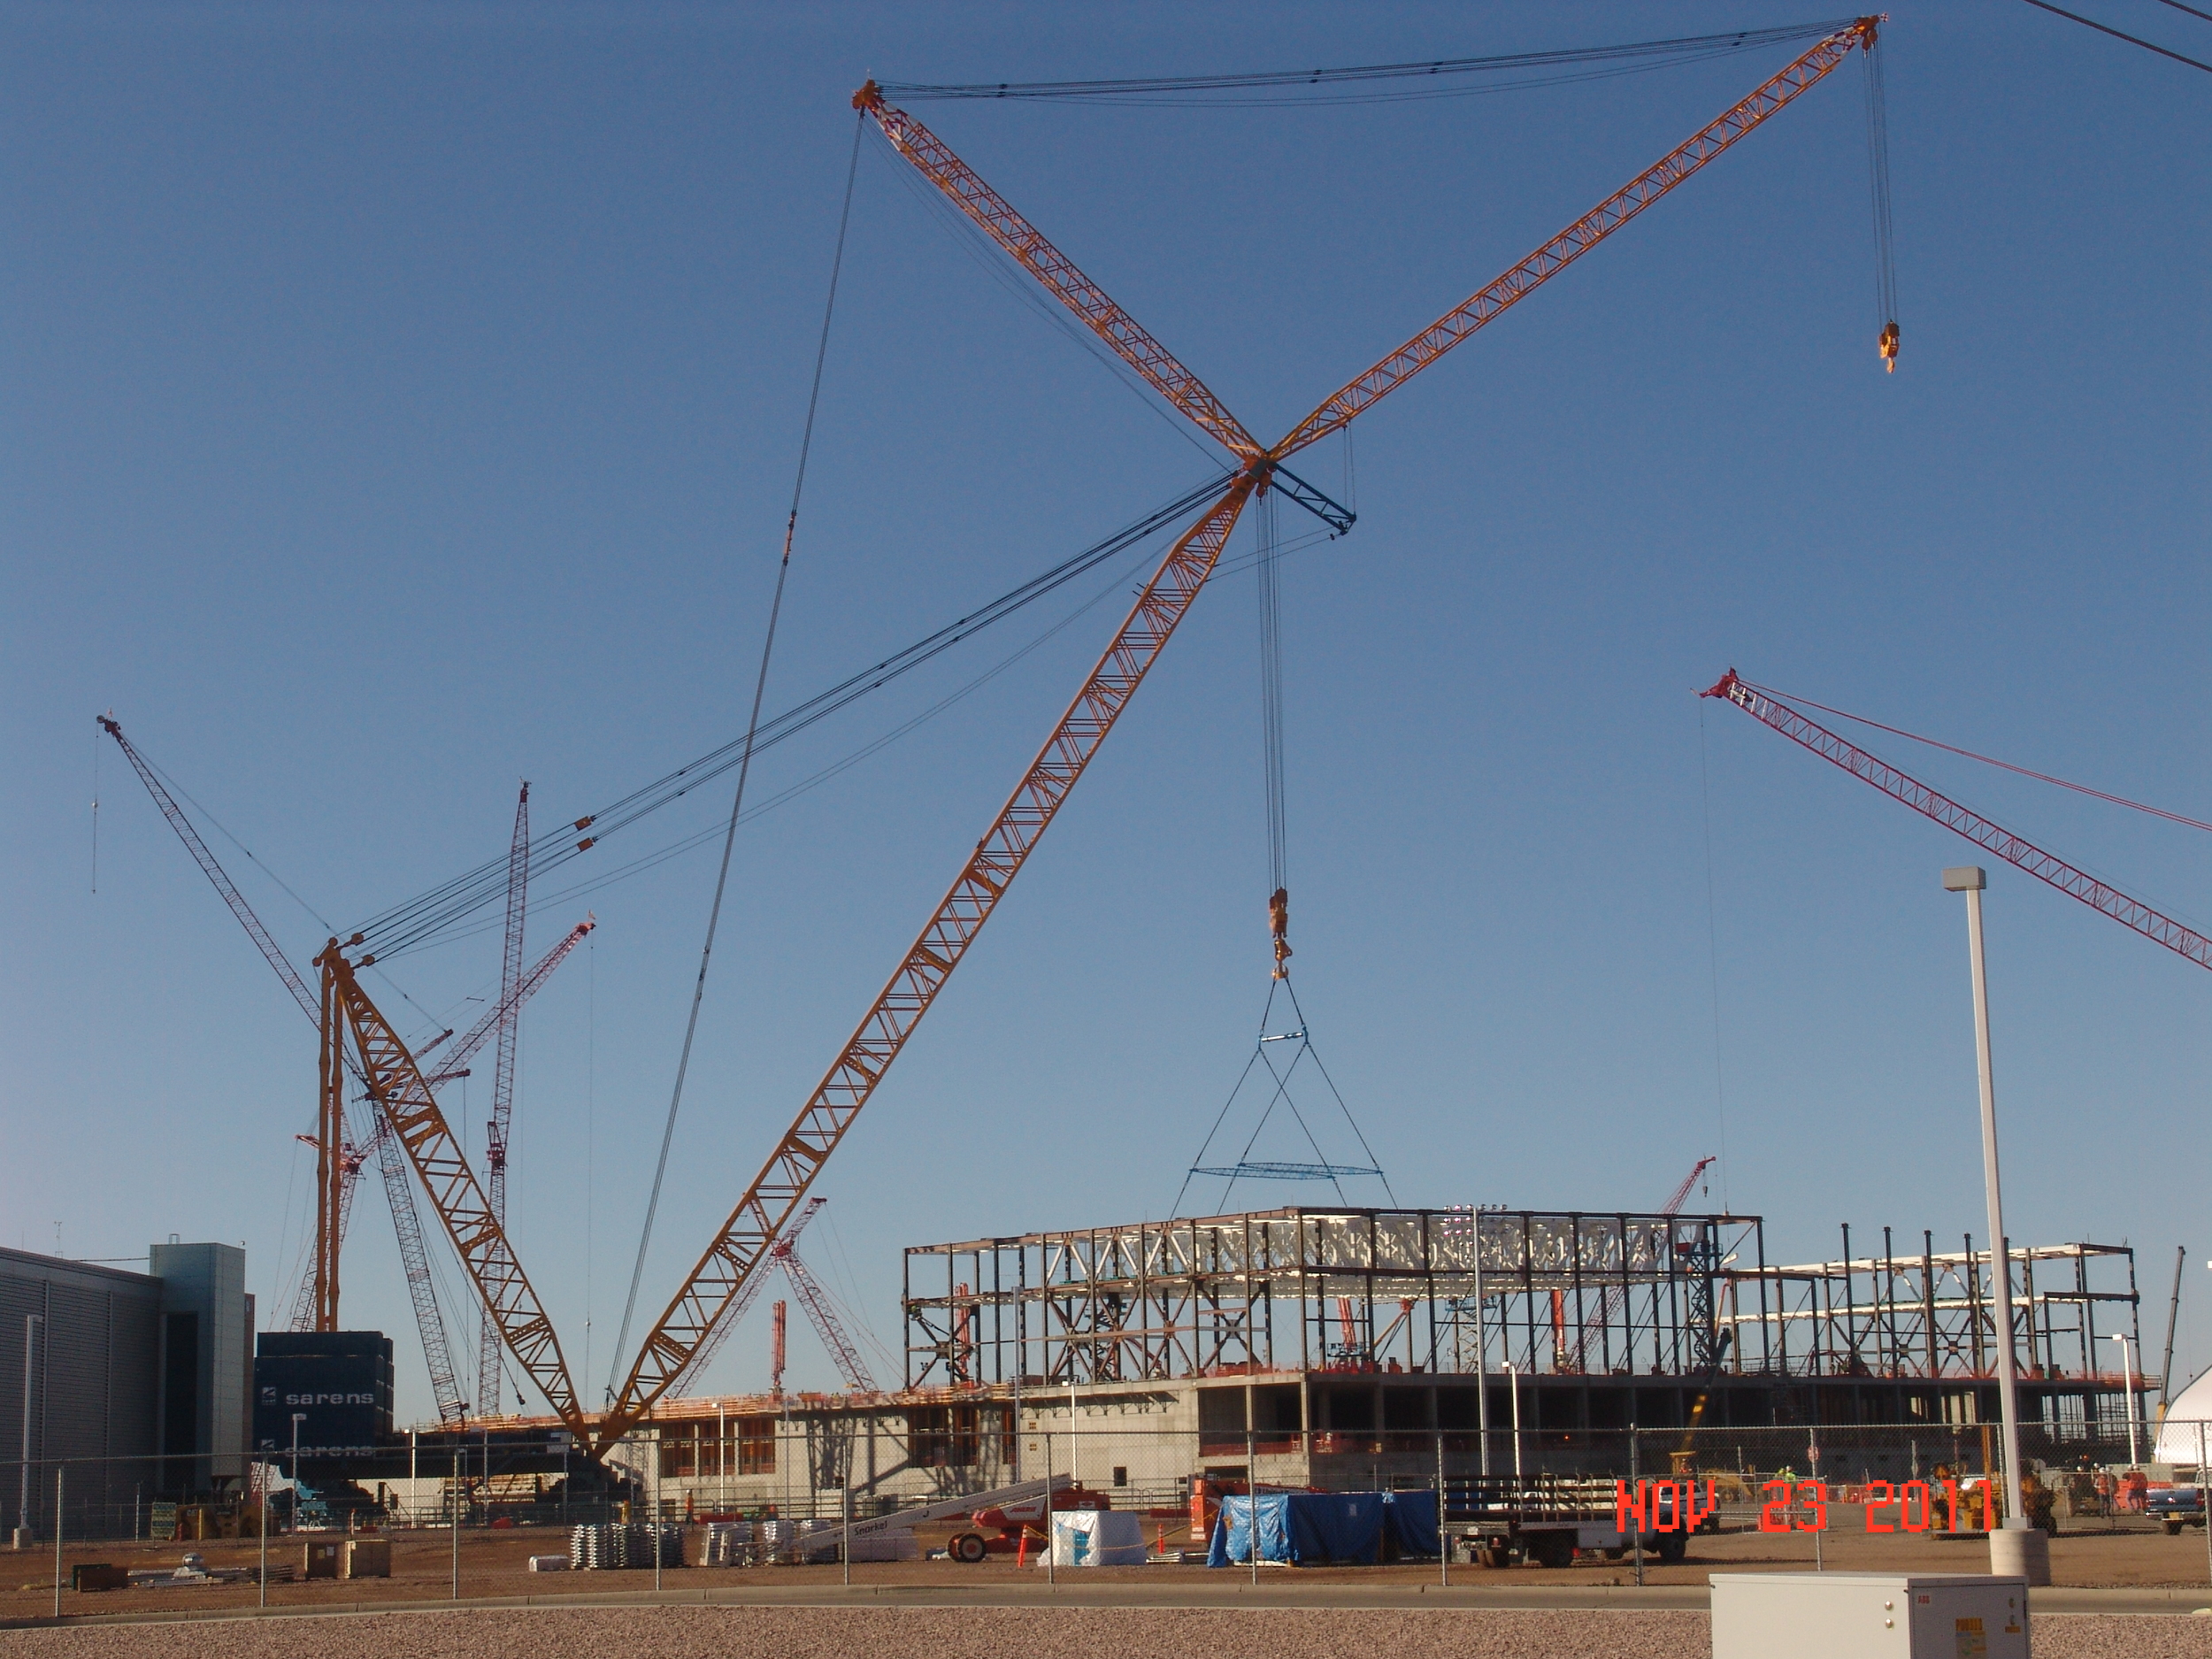
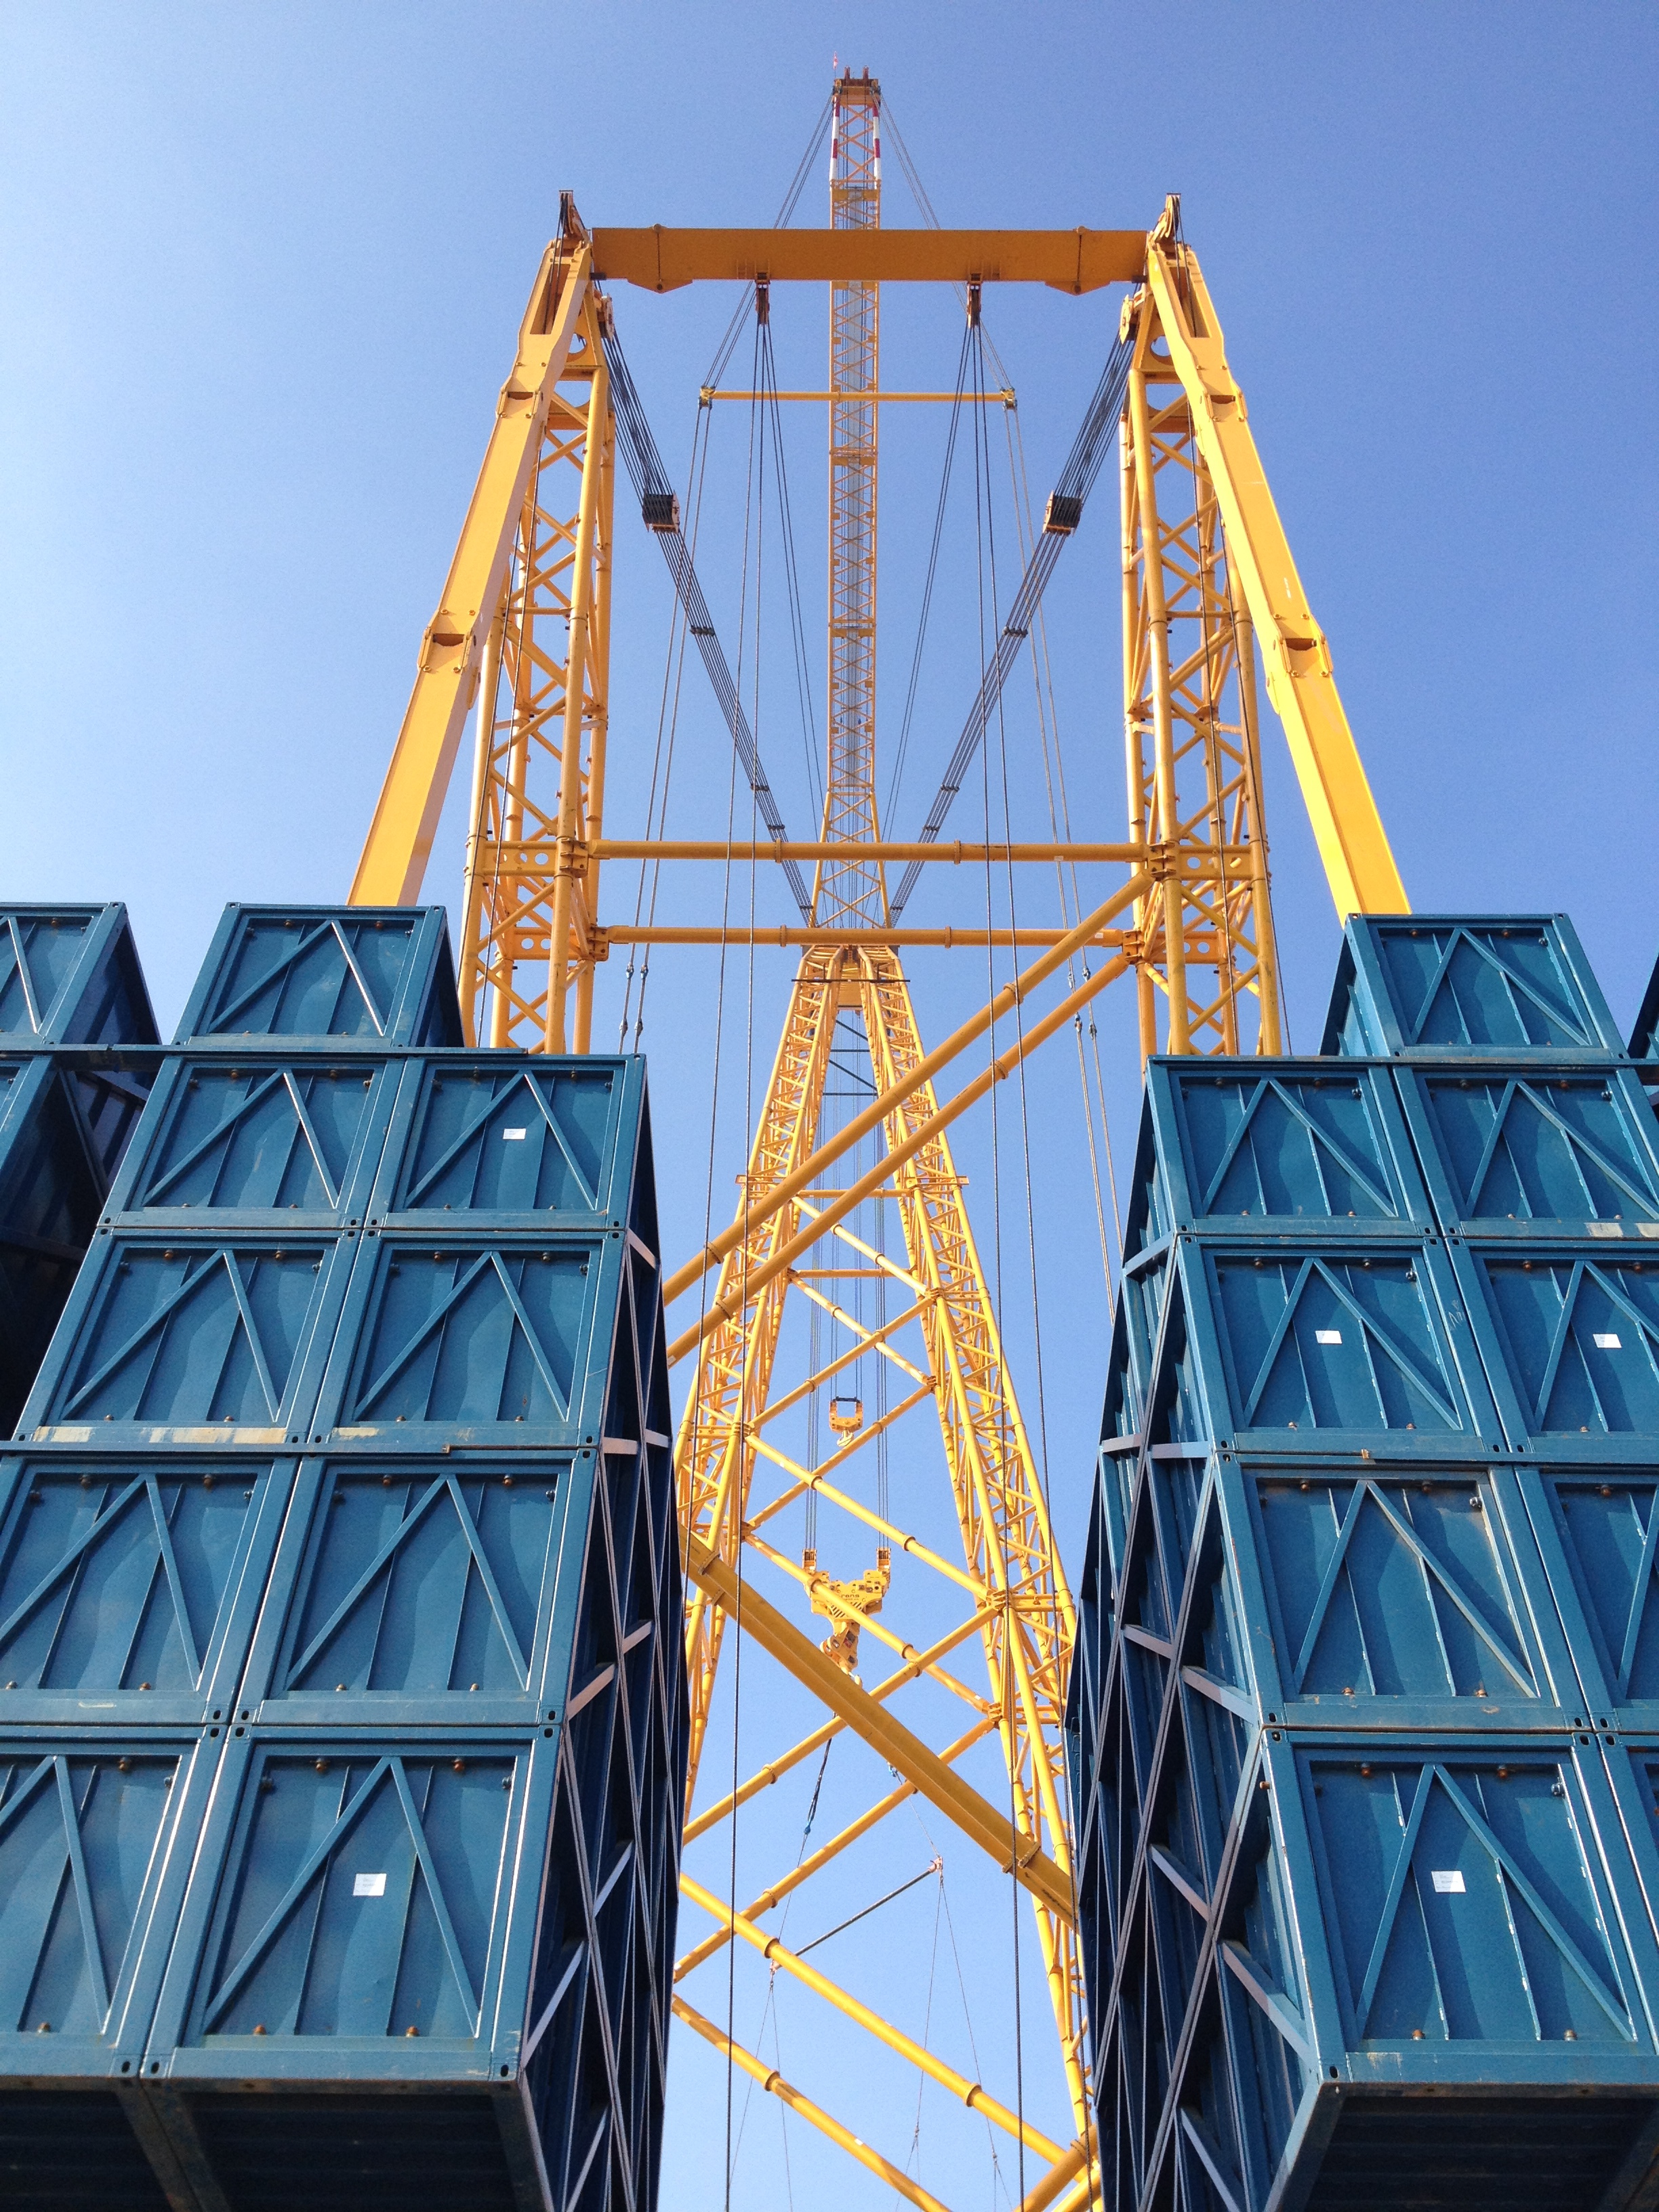
For 2012, the project request was straightforward. Intel was in the process of building two identical manufacturing facilities in Arizona and Oregon, at a cost of around $5 Billion each. The factories represent the state of the art for semiconductor manufacturing [3], but more importantly they are two of the largest cleanroom facilities in the world.

Our job was to highlight the massive scale of these new factories, larger than any Intel has built before, required to make microprocessors at a scale smaller than ever before. The two factories being built were identical, so since our studio was located in Arizona, and production was to take place in December, the Arizona factory was chosen as our subject.

With little more direction than that, we began to develop a story for the video. During concept development we discussed a number of ideas for emphasizing the enormous size of the construction project with the appropriate amount of “wow factor”. Our answer came in the form of the video’s playback venue.

The Venue

​The Anaheim Convention Center

The keynote presentations were set up with three projector screens above the stage that would be used together as one large, contiguous display. The combined screen measured nearly 160 feet wide, with a resolution of 7,360 x 1,080; more than twice the width of a standard cinema screen. With a display of such unique proportions, it was an easy decision to shoot panoramic video that would span all three screens, rather than create a collage of separate images to fill the space.

It was sure to be an incredible viewing experience, but within that opportunity was a major technical hurdle for the production team. At the time of production, no single camera existed that was capable of capturing an image of the required resolution. Still, we knew this was an avenue we wanted to pursue, and preproduction for a panoramic video began.

As we were discussing technical solutions to our resolution problem, it was suggested that we shoot with a single Red Epic camera, with a resolution of 5,120 x 2,700, and scale up the final image to fit the screen. While this would have been the easiest solution to implement both on set and in post, it failed the selection criteria for two reasons.

First, the image would be scaled to more than 140% of its original size, compromising the clarity of the final image. And even if a 140% blowup provided an acceptable level of quality, the math is not quite so simple. The Epic has a 5K Bayer pattern sensor that produces a measurable resolution closer to 4K. If we treat the Epic as a 4K camera, we’d be looking at a blowup closer to 180%. With a viewing distance between 30 and 200 feet in the auditorium, the quality loss may have been imperceptible to the audience, but the bigger issue was one of sensor size and optics.

To highlight the size of the factory and take full advantage of the massive screen size in the auditorium, we needed to shoot images with a large Field of View (FOV). The FOV of a given image is determined by a combination of the lens’ focal length and the size of the camera’s sensor [4]. Since there were practical limitations to the focal length of the lenses we would use (more on that in a moment), the only way to create an increased FOV was to increase the width of our sensor. Since we can’t change the actual sensor in the camera, we would need to find a way to combine multiple cameras, each with their own Super–35 sized sensor [5], to simulate a larger sensor camera.

Camera Selection

Now that we knew our solution would involve multiple cameras and wide angle lenses, we started crunching numbers to see which lenses we would use and how many cameras we would need. We could have easily satisfied the technical requirements for projection with two Epics, but we opted to use three cameras for a few reasons.

The first reason was this idea of a simulated large sensor camera. With a two camera solution, we’d need to use the widest possible lenses to properly capture the subject; the factory. The use of extreme wide angle lenses would give us a great deal of optical distortion around the edges of the frame and make postproduction very difficult when attempting to stitch the cameras together. Since we’d have essentially zero time to test just how much distortion would be too much, the safer choice was to use longer lenses on three cameras. Not to mention that using two cameras would place the stitch seam right in the middle of our final image. If there was any slop in the composite, there would be nowhere for our mistakes to hide. So, while we came prepared with a set of Tokina 11–16mm lenses, the widest focal length we used was around 25mm on two Red 18–50mm lenses and one Red 17–50mm.

On that note, we had initially hoped that postproduction would be as simple as hiding the seams of our final image in the small gaps between the three playback screens. However, during a preproduction meeting, we were informed that the center screen would be a good deal wider than the side screens, requiring us to deliver a seamlessly stitched image under the assumption that the seams would be on screen. Starting with a roughly 15K raw image gave us the ability to adjust the overlap between the three cameras based on the objects in the scene and the varying amount of parallax between the foreground and background objects; something that we would learn on set was extremely important for creating successful images.

Testing

After selecting the Epic as the camera for this job, we immediately requested three days of camera rental to test our yet-unproven design for the camera platform. Building an effective camera rig from scratch in under a week is a difficult task when it doesn’t involve multiple cameras.

As with most decisions involving money, it would take several days for us to receive an answer. With the start of production mere days away, there was no time to waste. Using what we had in the studio, we grabbed three Canon T3i DSLRs, some small tripod ball heads, and a cheese plate to create a proof of concept camera rig.

With no idea how best to align the three cameras, we created two proof of concept rigs; one to test correcting a vertical disparity between camera sensors and one to test a horizontal disparity. It was clear from the moment we turned on the cameras that the vertical rig was unusable, so on we went with our design of the horizontal rig.

​Test rig with vertical disparity

​Test rig with horizontal disparity

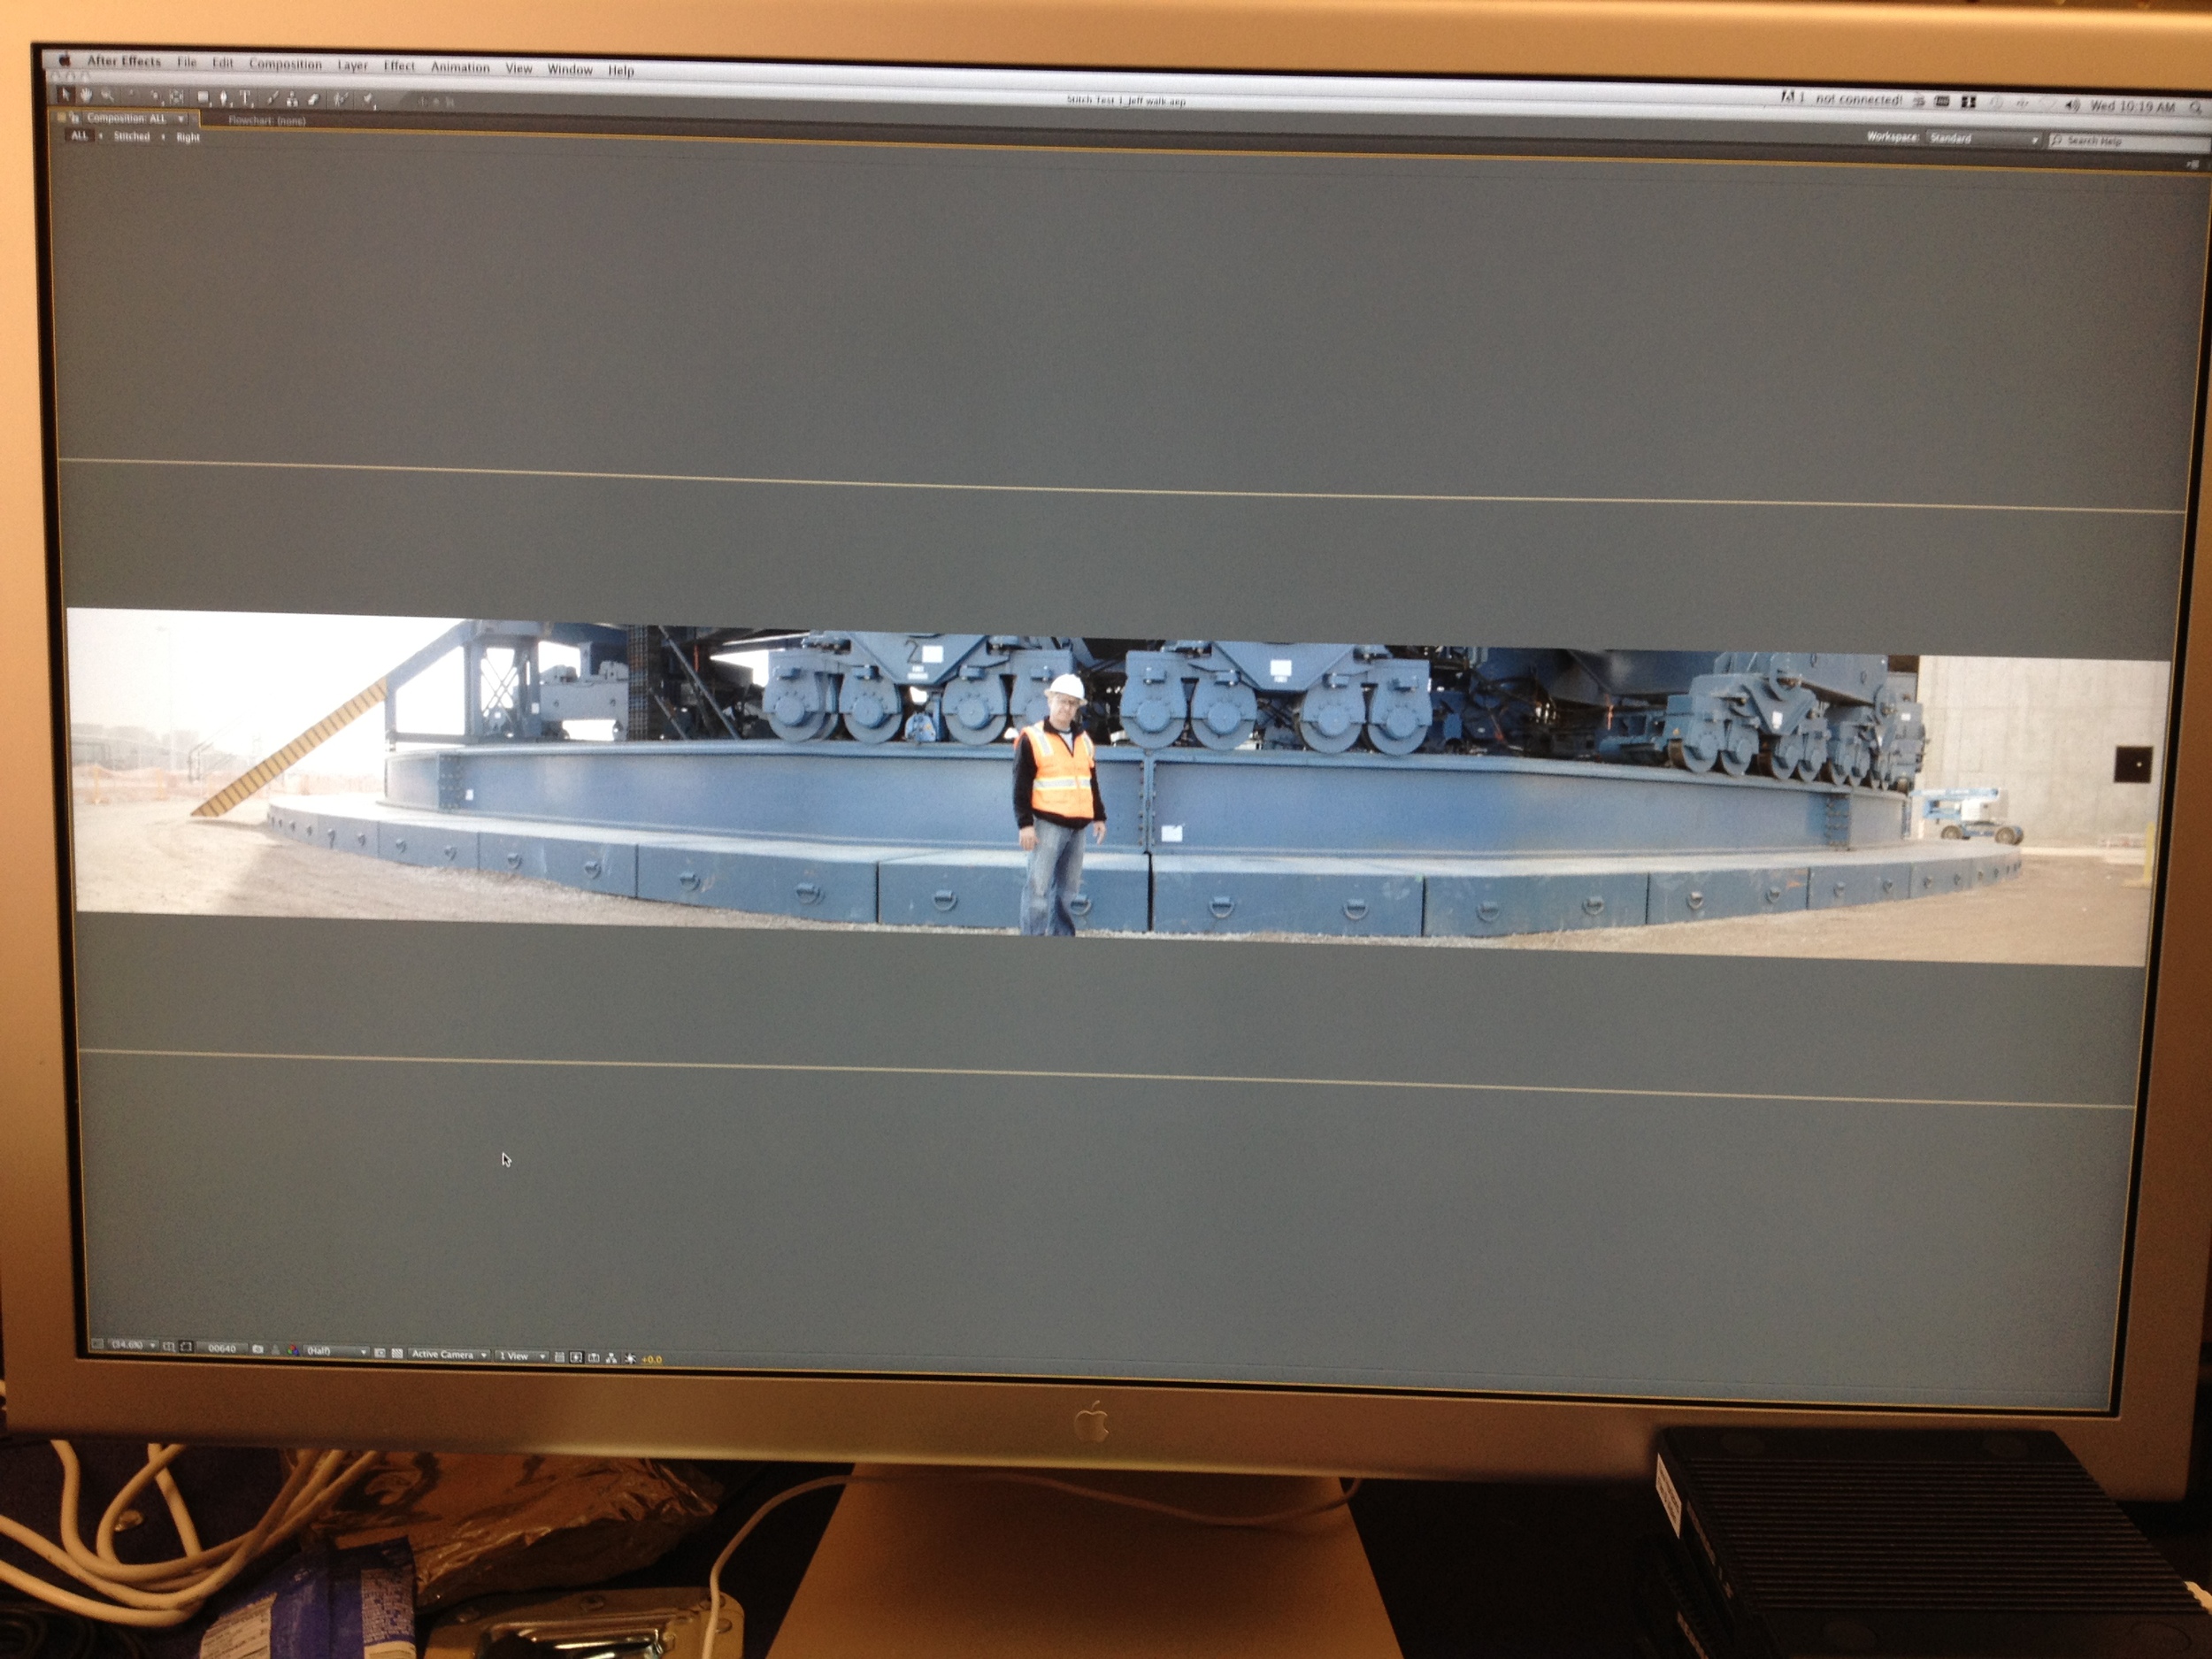
We set up the camera rig outside, near a corner of our office building, giving us a wide view of two sides of the building, the parking lot, and the street. Our primary concern for the stitching process was correcting the parallax discrepancies created by the physical separation of the cameras so, in the test footage, we had a person walk through all three frames, at a variety of distances from the cameras, to see how much error we would encounter in the stitching process. From there the footage was brought into Adobe AfterEffects, synced and aligned.

We determined we were able to stitch and sync the cameras to a relatively high level of success in just a few minutes but, as predicted, the camera separation caused serious parallax discrepancies that had to be corrected with shot-specific compositing. In our test footage, we got a successful panoramic image not by aligning the building that spanned all 3 cameras, but by ensuring that alignment was accurate at the object on which the viewer was focused. In this case, we had to ensure accurate alignment on the person crossing the screen and get creative with hiding misalignment in the background.

The aligning and stitching process felt surprisingly similar to Stereoscopic 3D postproduction we had completed for the 2011 ISMC Keynote [6] where we would ensure elements on the convergence plane were aligned perfectly, and would work around errors in the distant background or close foreground.

A major misstep in our testing process that would come back to bite us later was our failure to test camera movement. The final product was scripted to include pans, tilts, and jib moves, but we were in a hurry to report back to the production team as to the camera platform’s technical feasibility. We attempted to modify a tripod to accept our cheese plate camera platform, but it was clear from our lack of available hardware and materials that in order to test a moving shot we’d have to push back testing at least a day. After an hour of fruitless experimenting with the tripod, we gave up and decided to shoot the test static, propping up the rig on some apple boxes.

After shooting the tests, we spent the rest of the day trying to stitch the images, hiding seams and parallax errors. Just as we began to feel comfortable with the process that would be required, we received word that there was not enough money in the budget to test the real camera setup with Epics.

Building The Rig

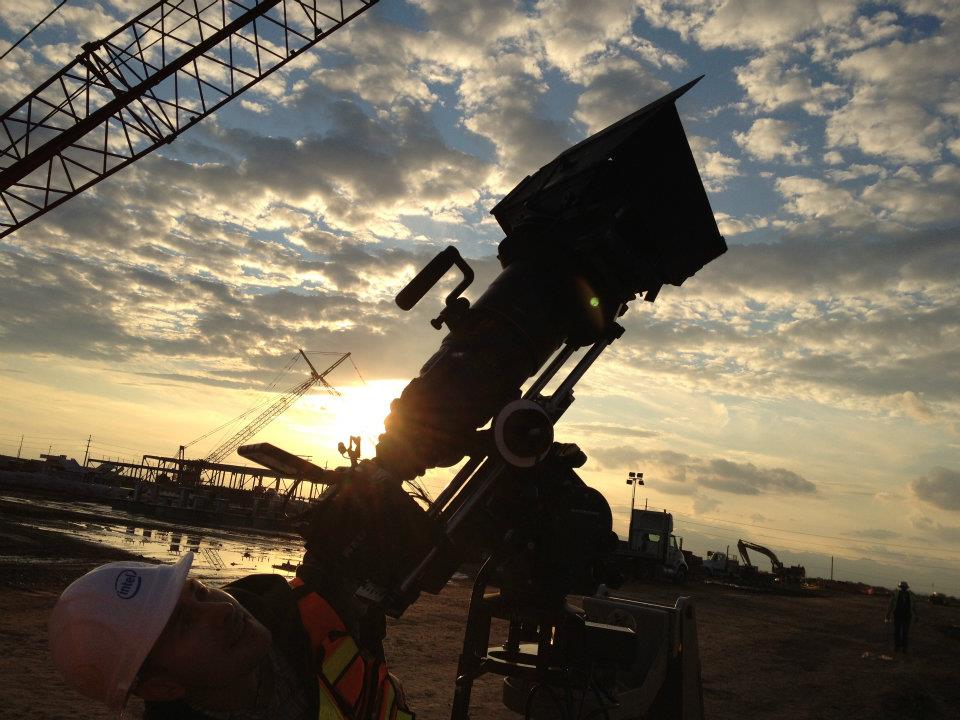
By now it was Friday and production was set to begin on Monday. Two of our three rental Epics had arrived, along with a variety of cheese plates and assorted hardware. We spent the day gathering the rest of the production gear and laying out potential designs of the camera platform.

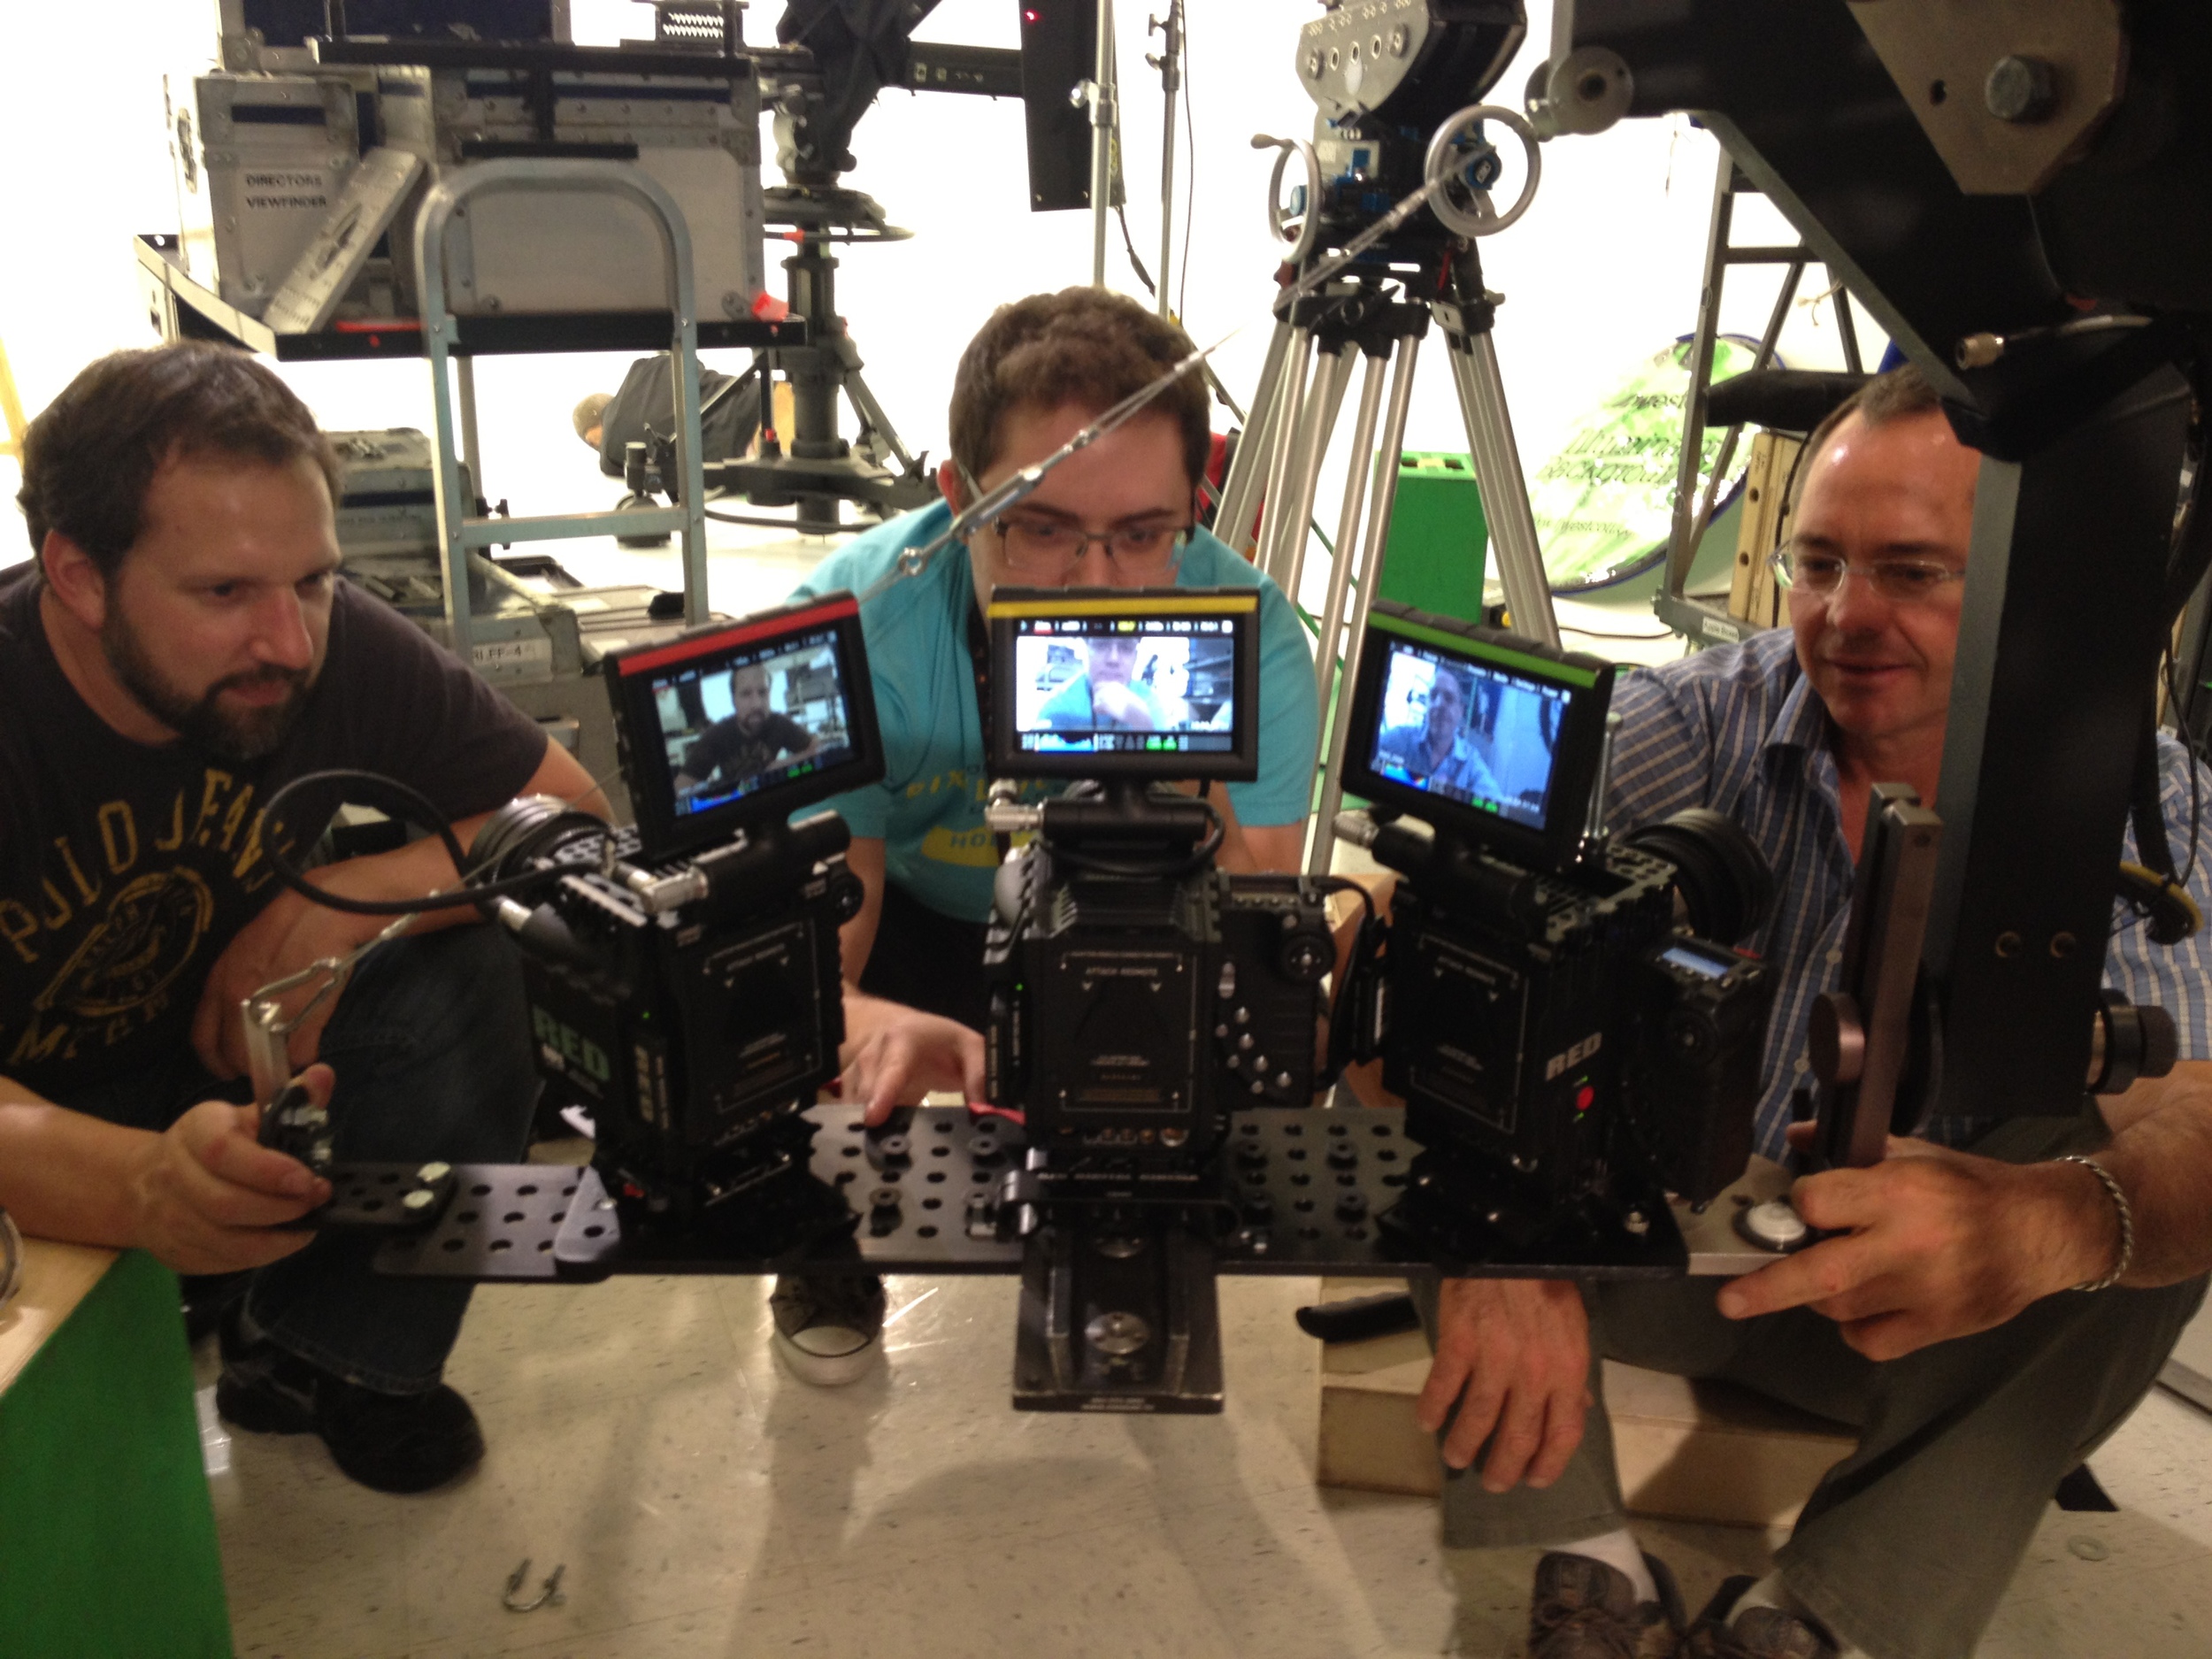
The first incarnation of our camera platform was built as small as possible to keep the cameras close together and minimize overall weight, but after seeing how much the metal flexed under the fully built rig, we realized larger and thicker cheese plates would be required. We also benefited from using larger plates in our ability to slide the cameras forward and backward on their dovetails, giving us greater balance control over the more minimalist rig.

​Initial smaller camera platform design

​Final camera platform with larger cheese plates

On Saturday the production team gathered in our studio to build what would hopefully be our final camera platform. We had our jib operator bring his gear so we could make sure our solution would mount properly to his equipment. The majority of the day was spent drilling into the cheese plates so we could countersink the large bolts that were necessary to hold the pieces together.

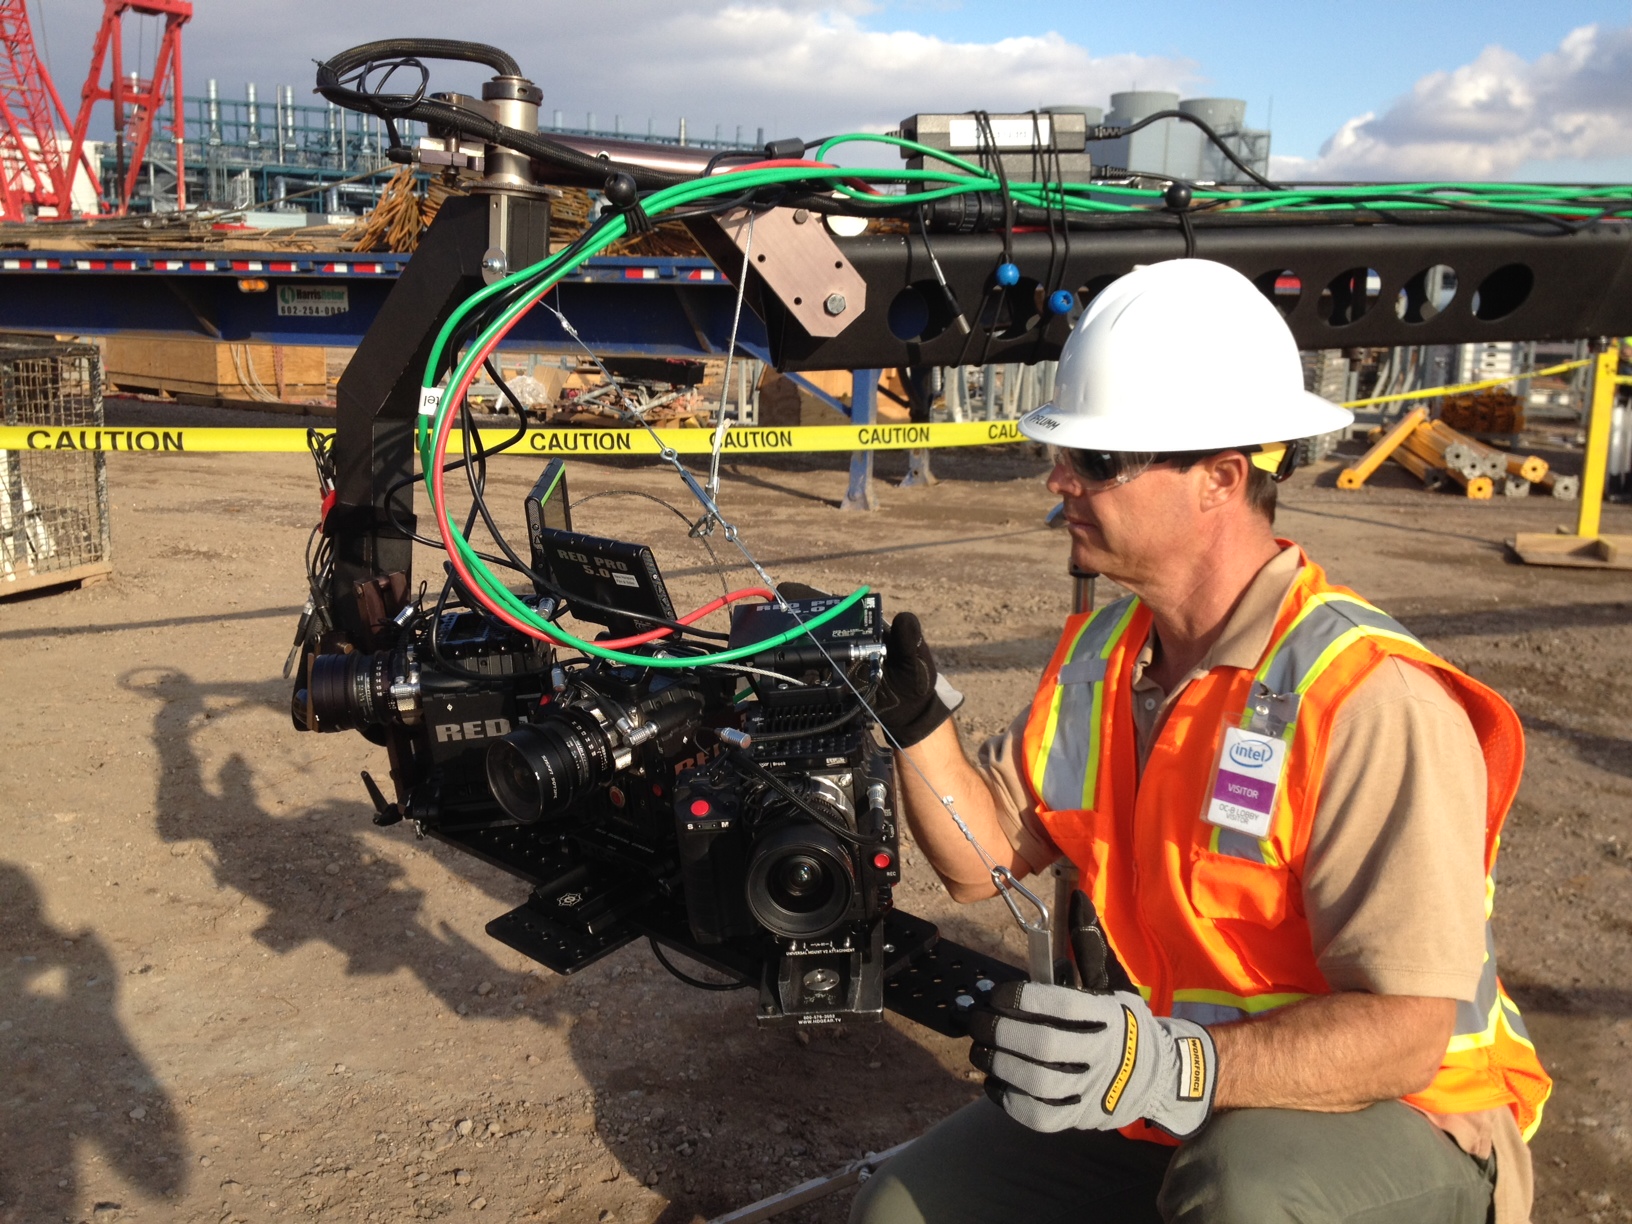
The addition of a small plate and some angle-iron on the far side of the platform allowed us to attach a support cable to the arm of the jib, taking the weight off of the delicate motors and reducing the amount of bounce to the system. We wouldn’t find out for another couple of days, but it sure looked like we had a camera rig that was going to work.

​Here you can see the additional support cable connecting the far edge of the camera platform with the jib arm.

Just like every other step of the project, we documented the rig building process with our iPhones. When we had the cameras up and running, I posted two photos of our setup on Twitter.

The next day, I received a response from a gentleman names Zac Crosby that included a picture of a panoramic rig built with Epics that he had recently used for a project. His rig was different than ours, built in an almost cube shape with a larger angle between the cameras than we had chosen. It seemed as though Zac’s rig was built to serve a purpose different than ours, but our optimism was re-energized by the idea that we were not the first to attempt such a thing. Especially in light of the (completely unfounded) assumption that if his project had suffered some catastrophic failure, he would have cautioned us about shooting panoramic video.

Lens selection

Since we had to place our gear order before we had a rig design, we took our best guess at which lenses we would need. Being that our goal was to create a massive wide angle image, we ordered three Tokina 11–16mm PL mount lenses, as well as two Red Zoom 18–50mm lenses to supplement our own Red Pro Zoom 17–50mm lens.

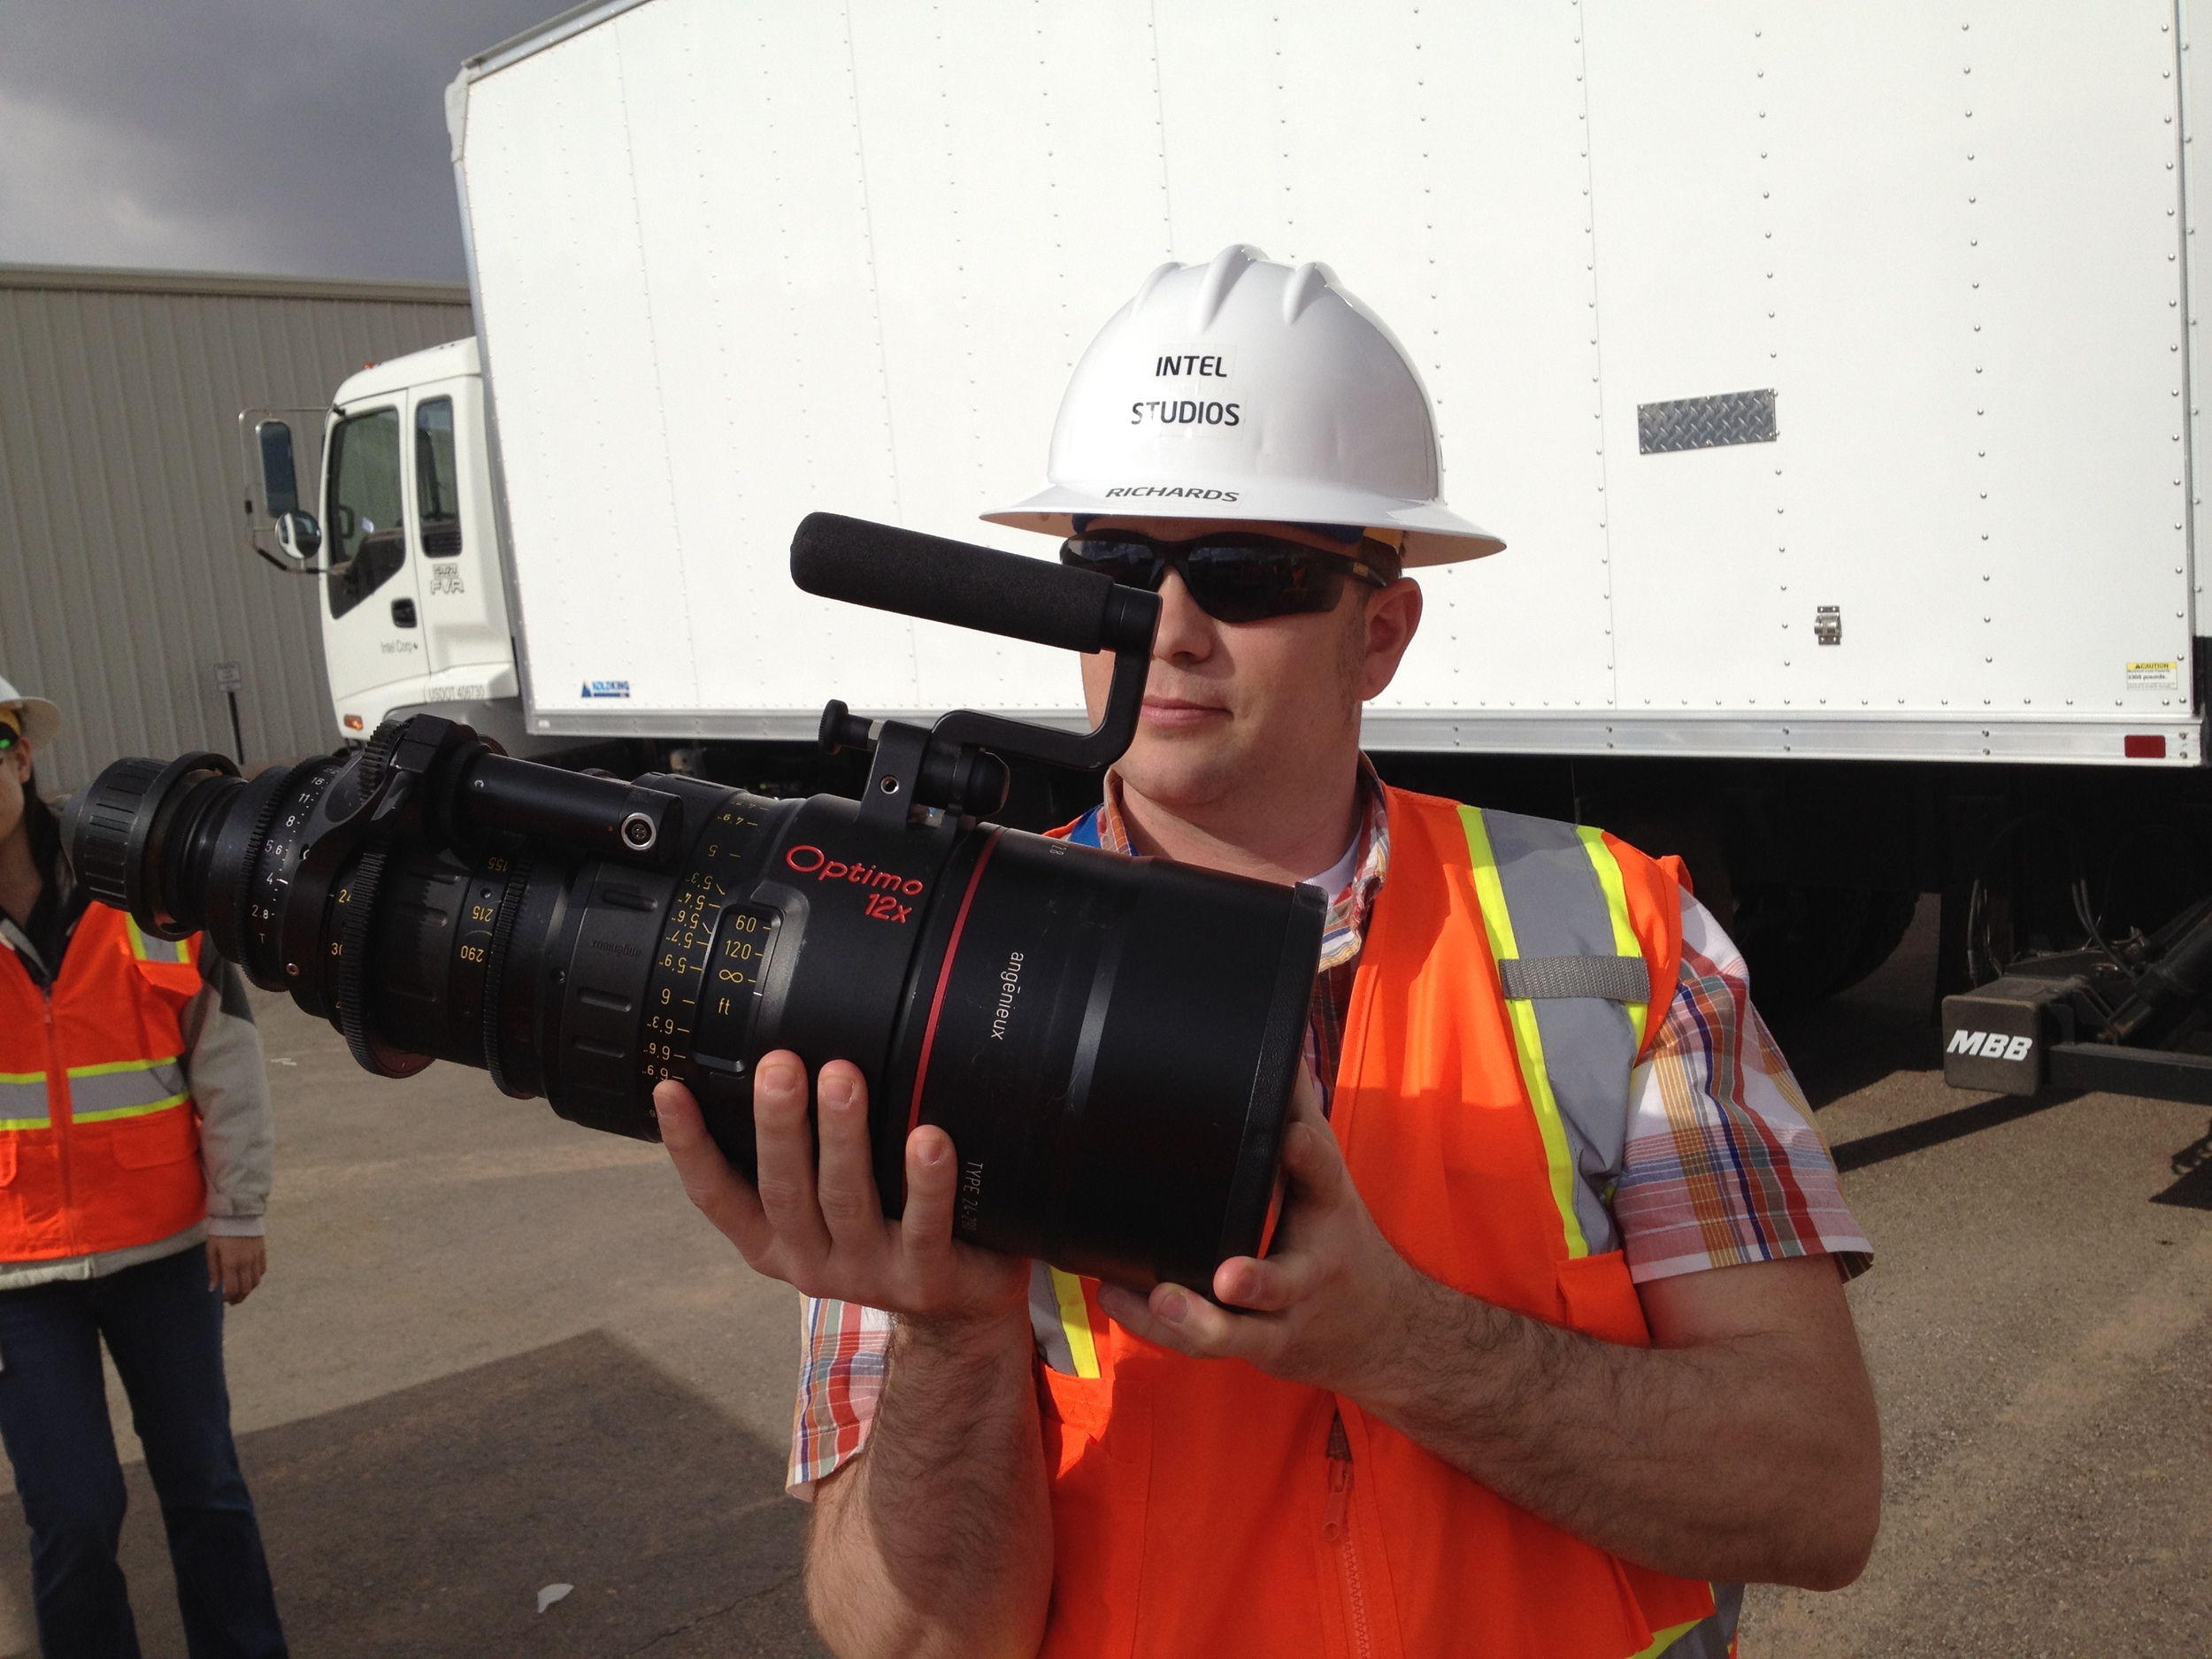
To mitigate some of our risk, not every shot in the video was to be shot panoramic. There would also be instances of collages made up of multiple images, so we brought along our Red Pro Primes, as well as an Angenieux Optimo 24–290mm zoom.

When we finally got lenses on the cameras, we determined a focal length between 20mm and 40mm gave us the best balance of a wide FOV, minimal lens distortion, and enough overlap to properly stitch the shots.

For the majority of the shoot, all three cameras were sporting the Red Zoom lenses. Since we already owned a Red Pro Zoom 17–50mm lens, we only rented two more zooms. In our search for local rental gear, we were only able to find the older 18–50mm Red Zooms. Having never put the updated model side-by-side with its predecessor, we were unaware of the dramatic differences in optical distortion between the two.

The mismatched distortion turned out to not be a problem, but due to our inability to properly test the camera setup, it wasn’t discovered until we began to stitch dailies on set and found undistorting images was not producing expected results. A potential disaster, averted by sheer luck.

On Set

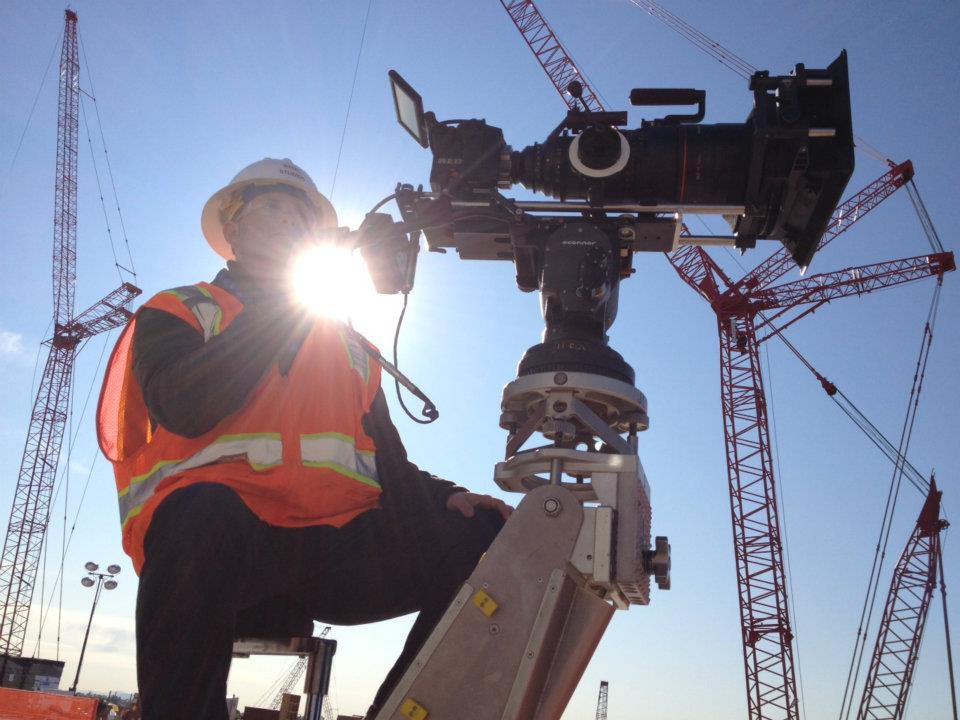
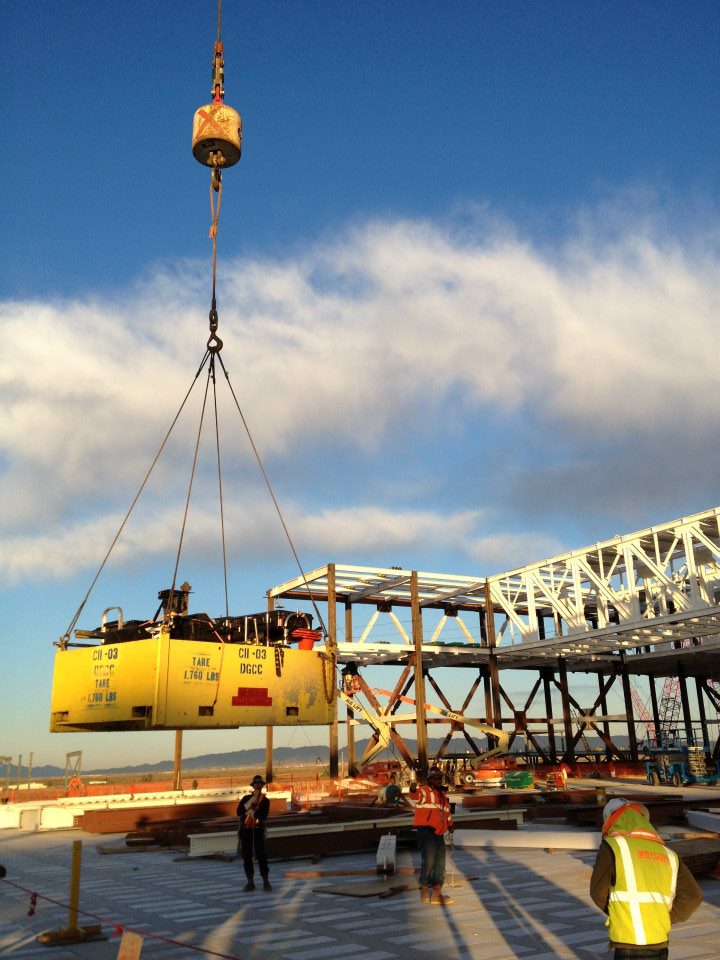
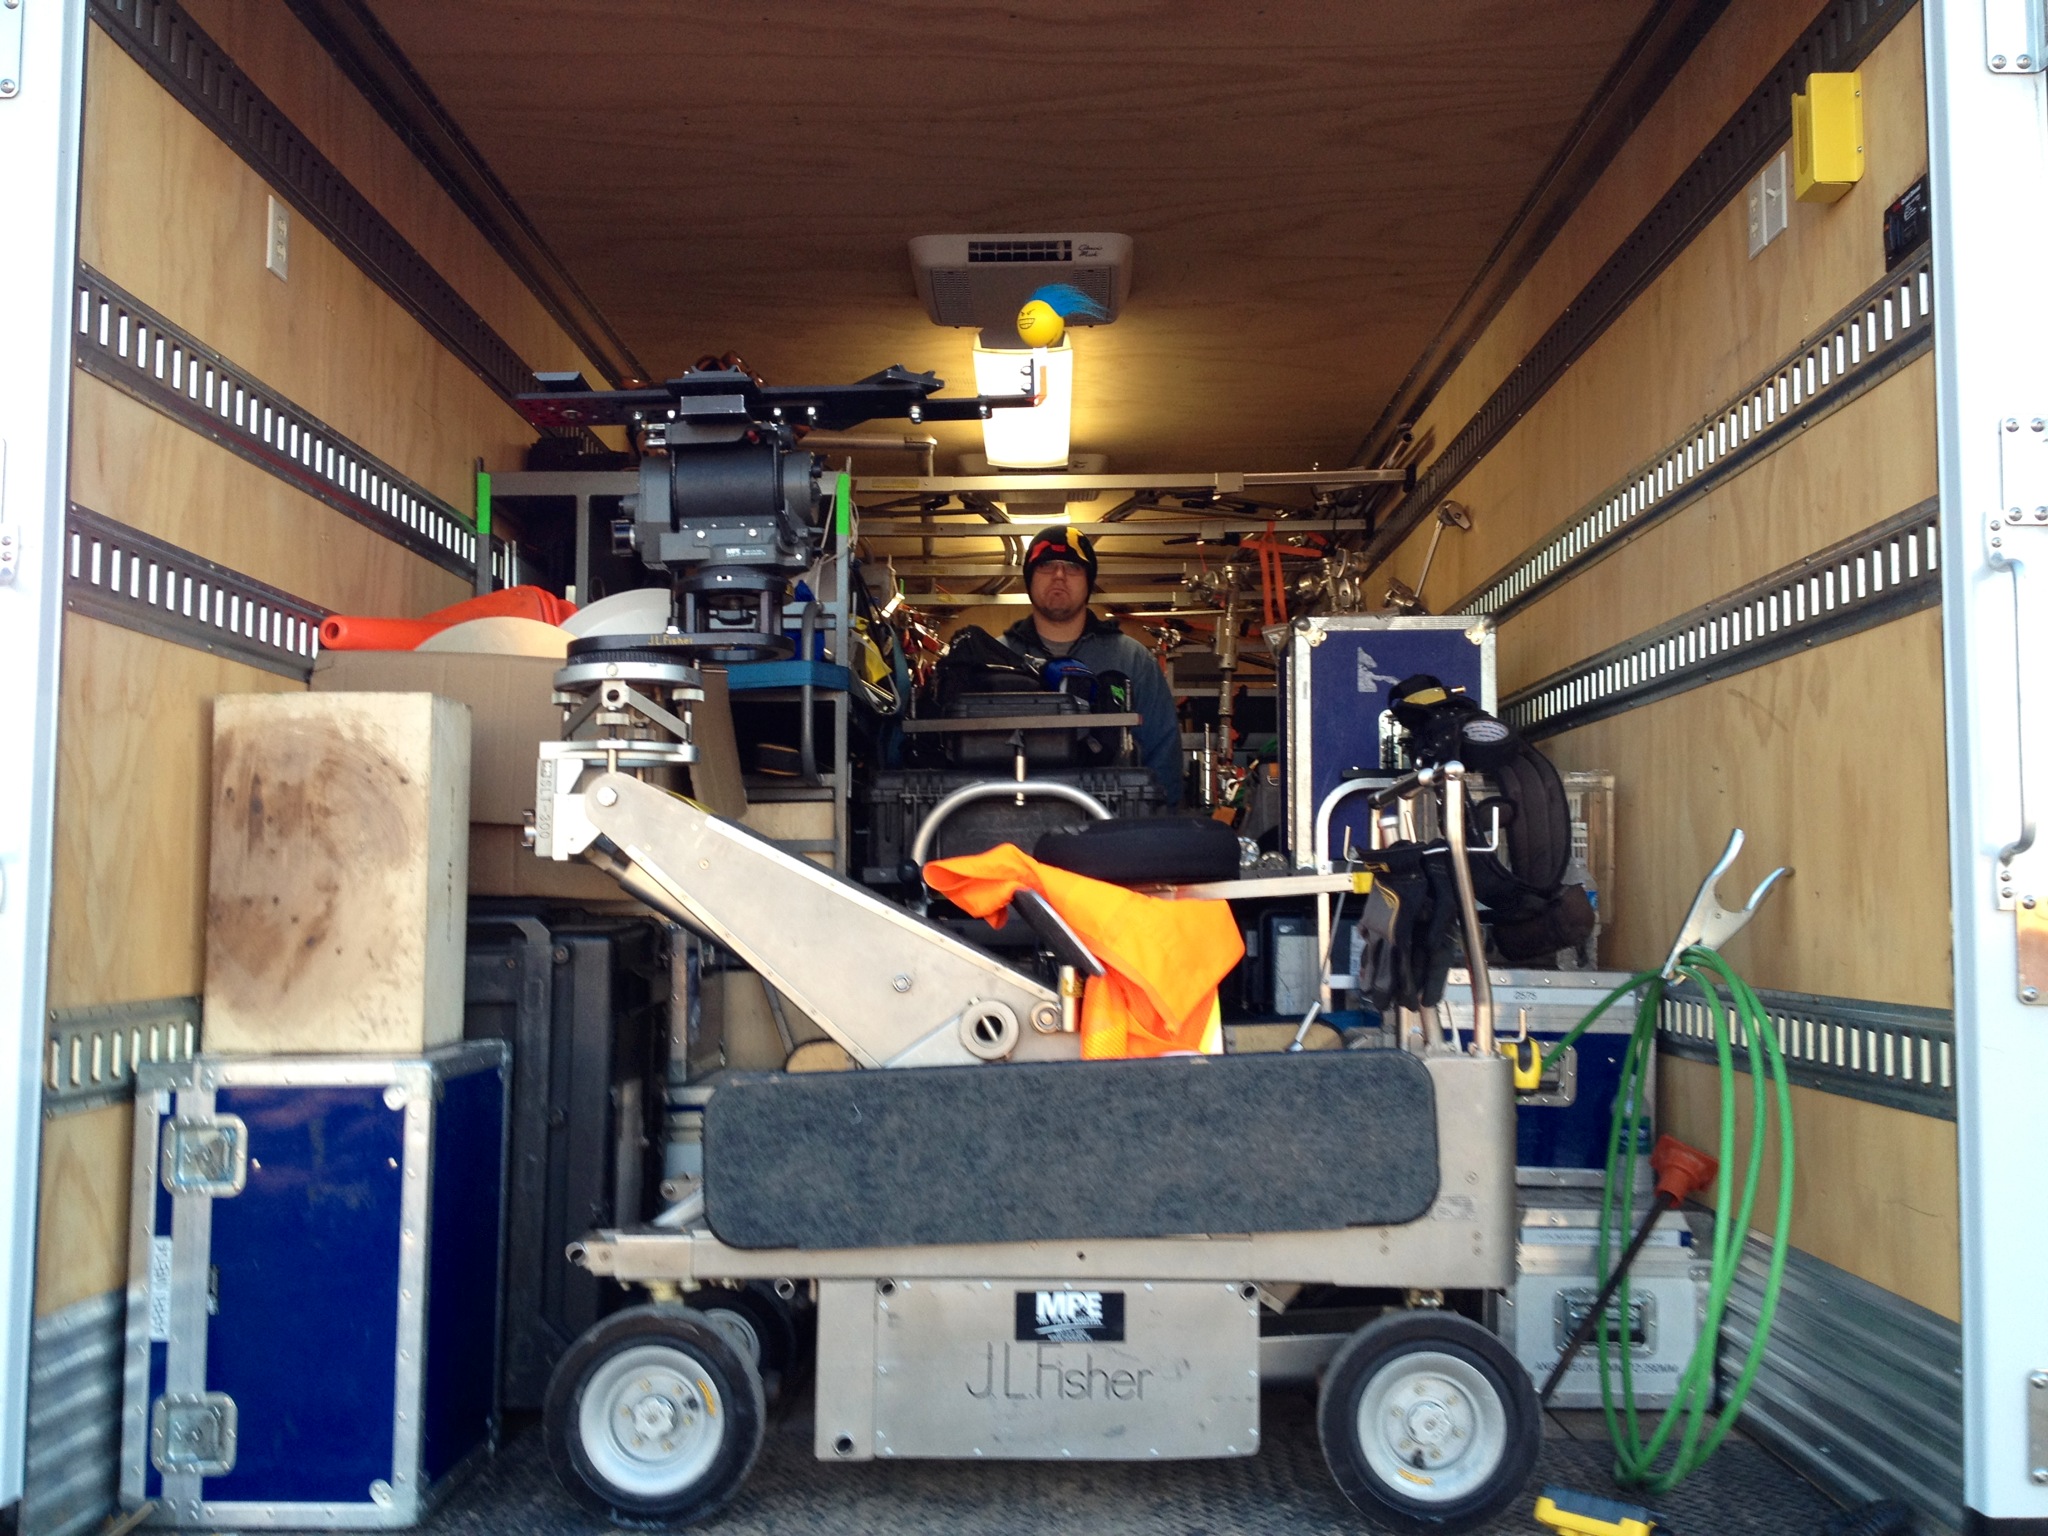
Monday morning started with a lengthy safety briefing from our site escorts before driving our grip truck, with DIT station inside, onto the heavily guarded construction site.

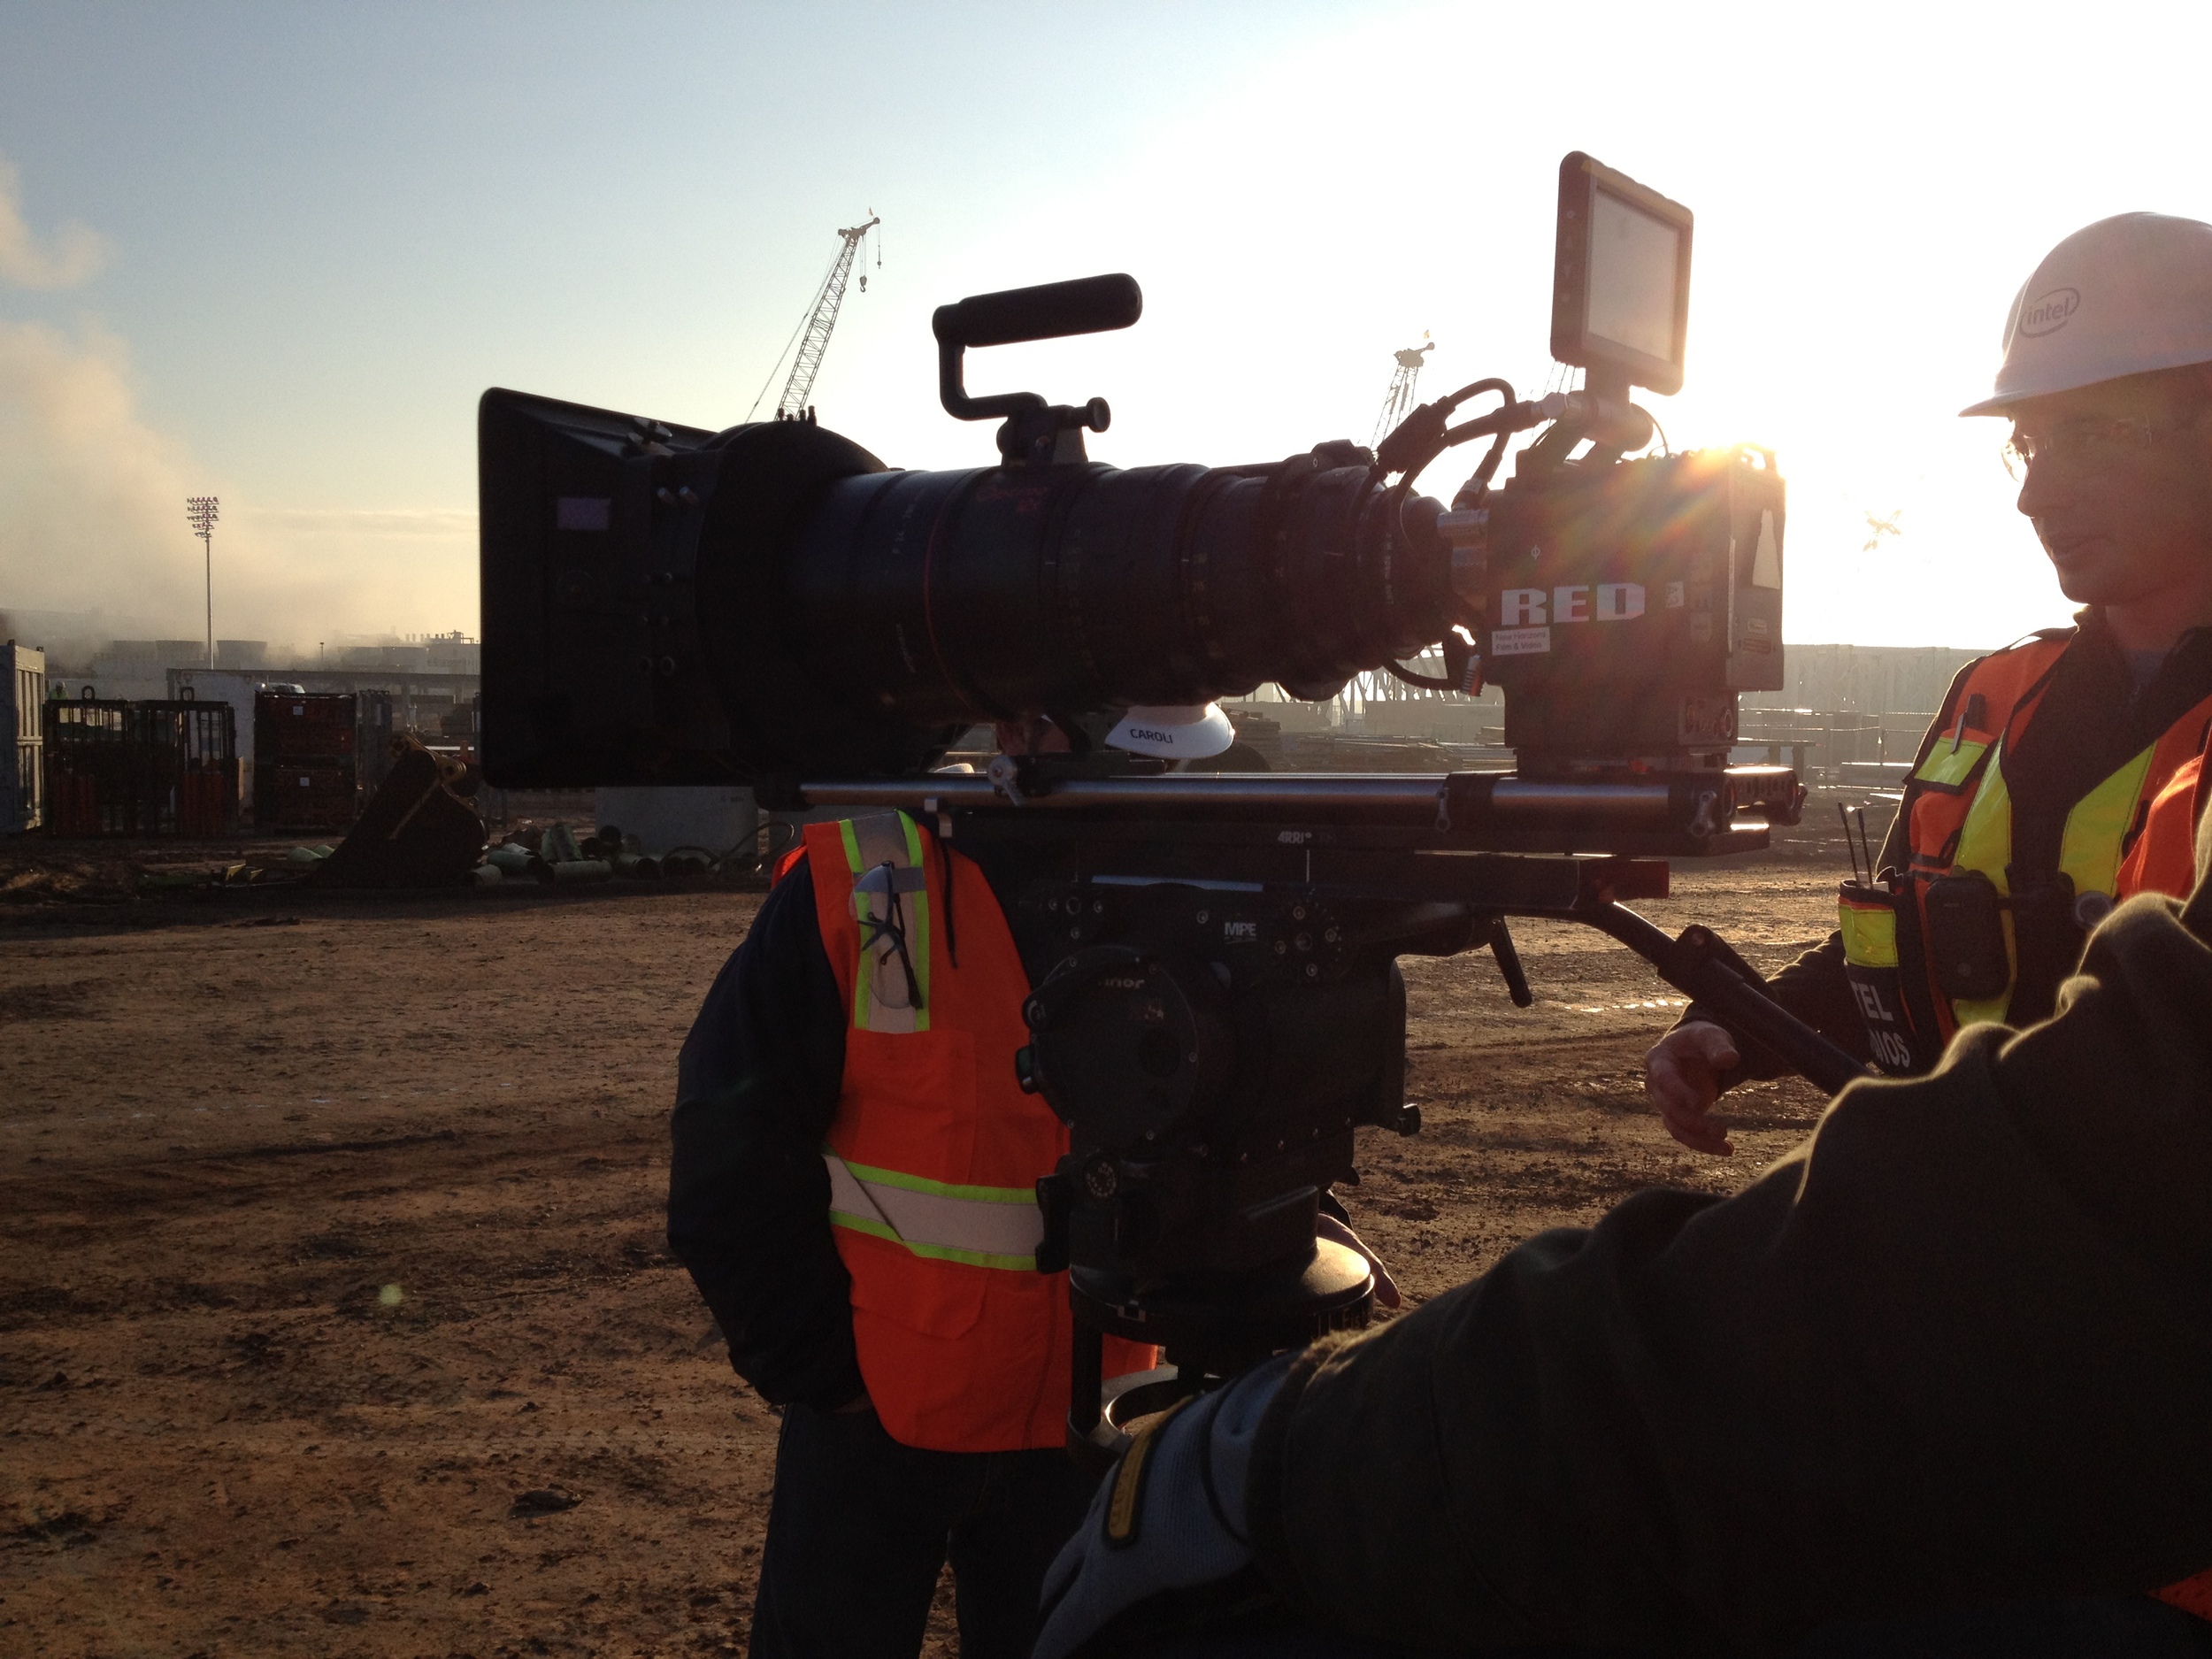
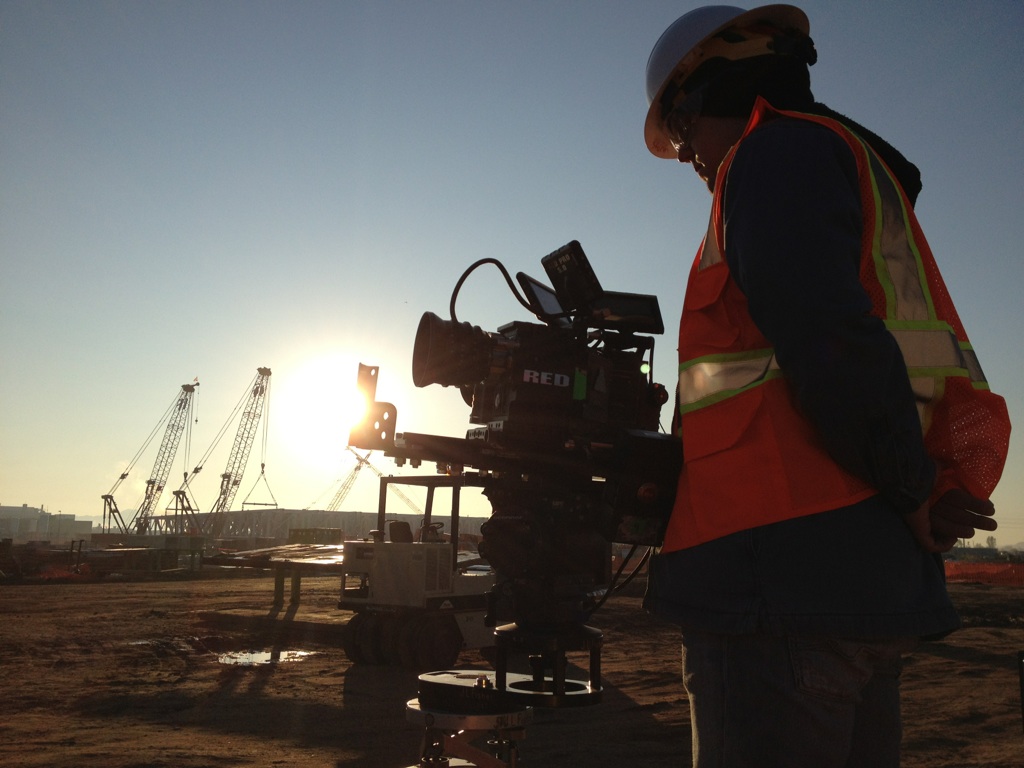
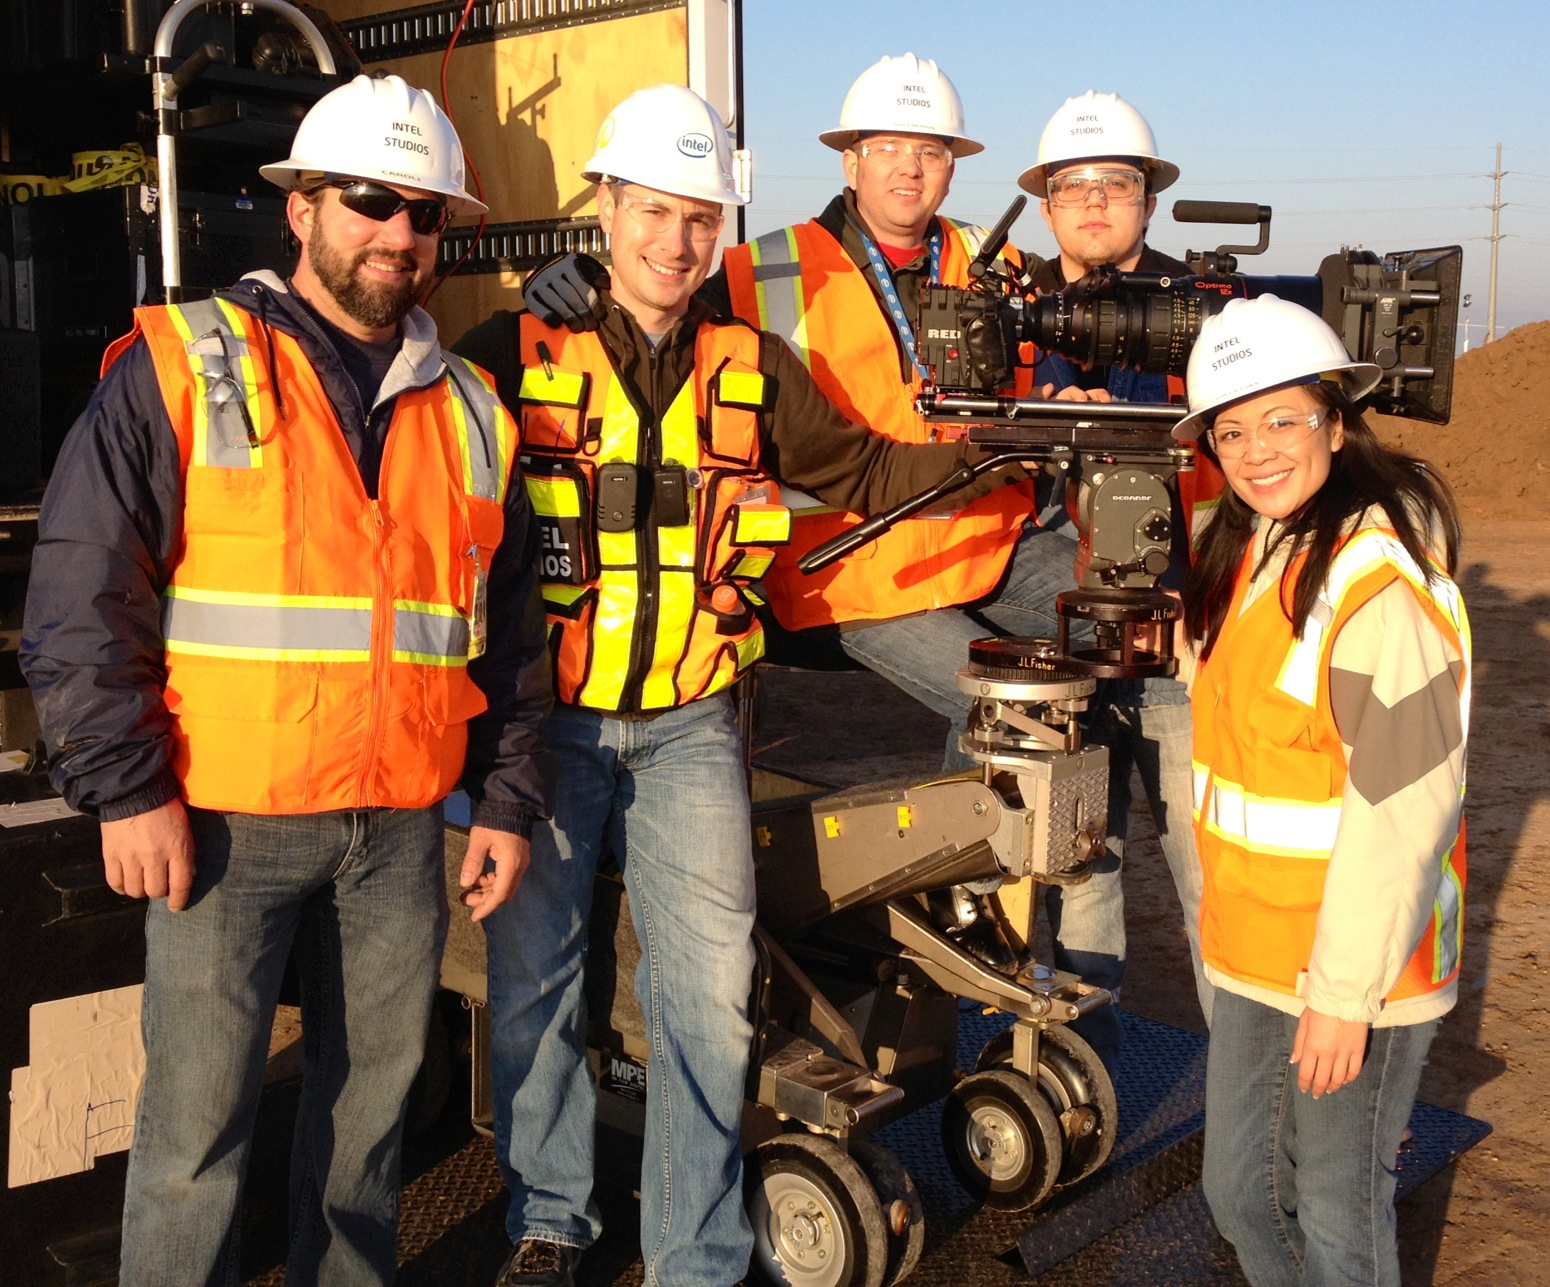
Once inside, we built our camera rig on the jib. We brought along a Fisher 10 dolly, but it was mostly used as a building and transportation platform for the camera rig before transferring it to the jib for shooting. The dolly was also used, to a lesser degree, for one-off static shots between setups. It was the last thing loaded onto the truck and the first thing off, so we occasionally rolled it to the edge of the lift-gate and picked off a few shots from an elevated position.

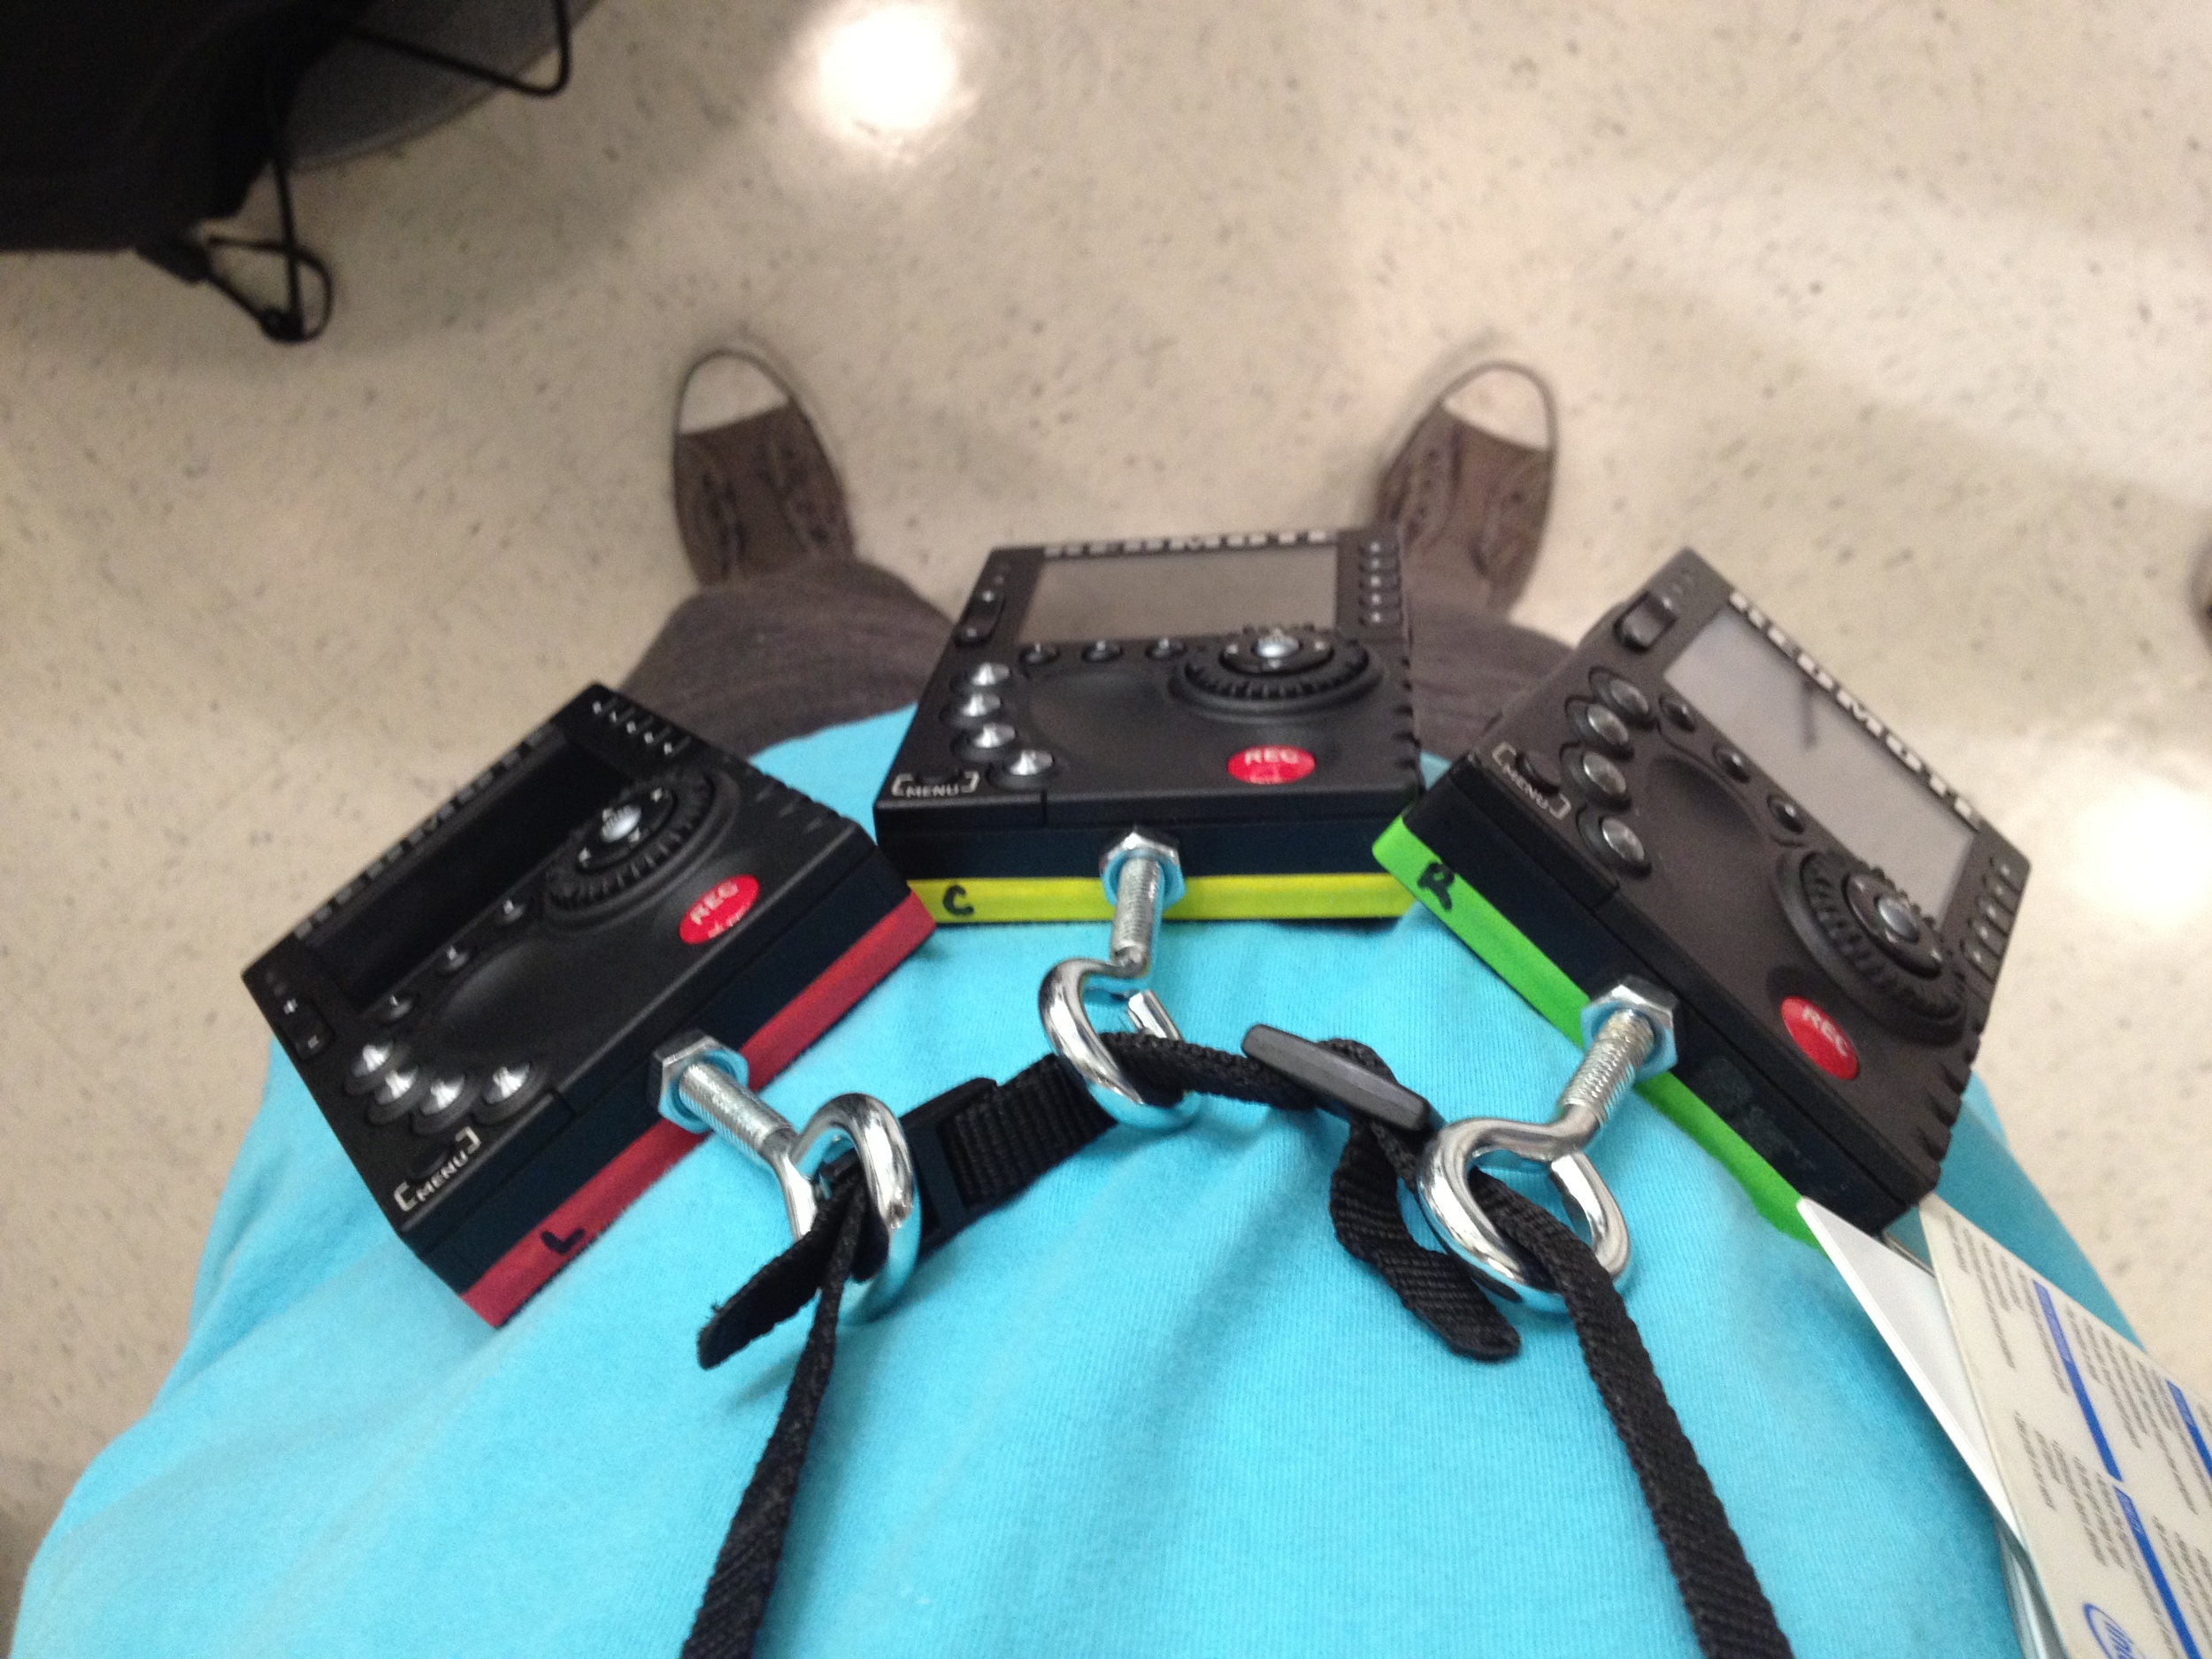
The cameras were set to record in 5KFF (to take full advantage of the sensor’s FOV) at 24fps and a compression of 6:1. As is often done on shoots involving multiple cameras, each camera, its associated accessories, and magazines were color coded to avoid confusion. A small effort that greatly helped speed up downloads and dailies.

Once we had the jib operating on a live set, we immediately noticed that any tilting of the camera platform caused the left and right cameras to dutch severely. Obvious in retrospect, as all three cameras were rotating on a different axis to their focal plane.

Since our time on the construction site was limited, redesigning the camera platform was not an option. Instead we had to limit our camera movement to booming up and down.

We discovered another limitation of the camera rig while attempting to swing the camera from left to right, following our talent, and booming up over a large mound of dirt to reveal the construction site. Since our talent and dirt hill were about 20 feet from the camera and the construction site was about 200 yards away, our parallax was irreconcilable and, due to the horizontal movement of the jib, there was nowhere to hide the seams should we try to hack the shots together.

After declaring the setup unusable, it was recommended that we either reshoot the scene, limiting the camera move to a simple boom-up, or we spend an unknown amount of time in post separating and completely rebuilding the shot in VFX, to an indeterminable level of success. As with production, our post timeline was extremely limited so we opted to reshoot the scene the next day.

Once we understood the rig’s limitations, the production proceeded relatively smoothly. The only hiccup occurred when one camera’s dovetail came loose in transit, causing the camera to do a backwards somersault off the jib onto the ground. Luckily the jib was only about 12 inches off the ground and the camera landed squarely on the Red Touch 5.0 LCD. The camera was unharmed, and the LCD was perfectly functional, but the metal swivel near the lemo connection snapped and the frame of the LCD was scuffed [7]. The Epic, though, is a tough camera and we were back up and running in a matter of minutes.

Since we knew we would need to undistort the images from each camera in order to stand a chance at stitching them together, we created several 24’’ x 36’’ checkerboard grids on foam boards that were recorded at the beginning of each setup.

Our inability to test the rig in preproduction also resulted in one of our more clever solutions for syncing the cameras. We had neither the cabling nor the knowledge to properly timecode sync three Epics. Our solution involved placing our 24’’ x 36’’ foam lens distortion grid about 4 inches away from the center camera so it was just barely visible on all three cameras at the same time. When the card was in place, someone would flash a DSLR flash against the white board, causing a flash-frame on all three images. It didn’t give us perfect results, and sometimes we had to flash the board twice since the shutters on each camera were not synced, but it was effective enough to give us a useful sync point.

DIT

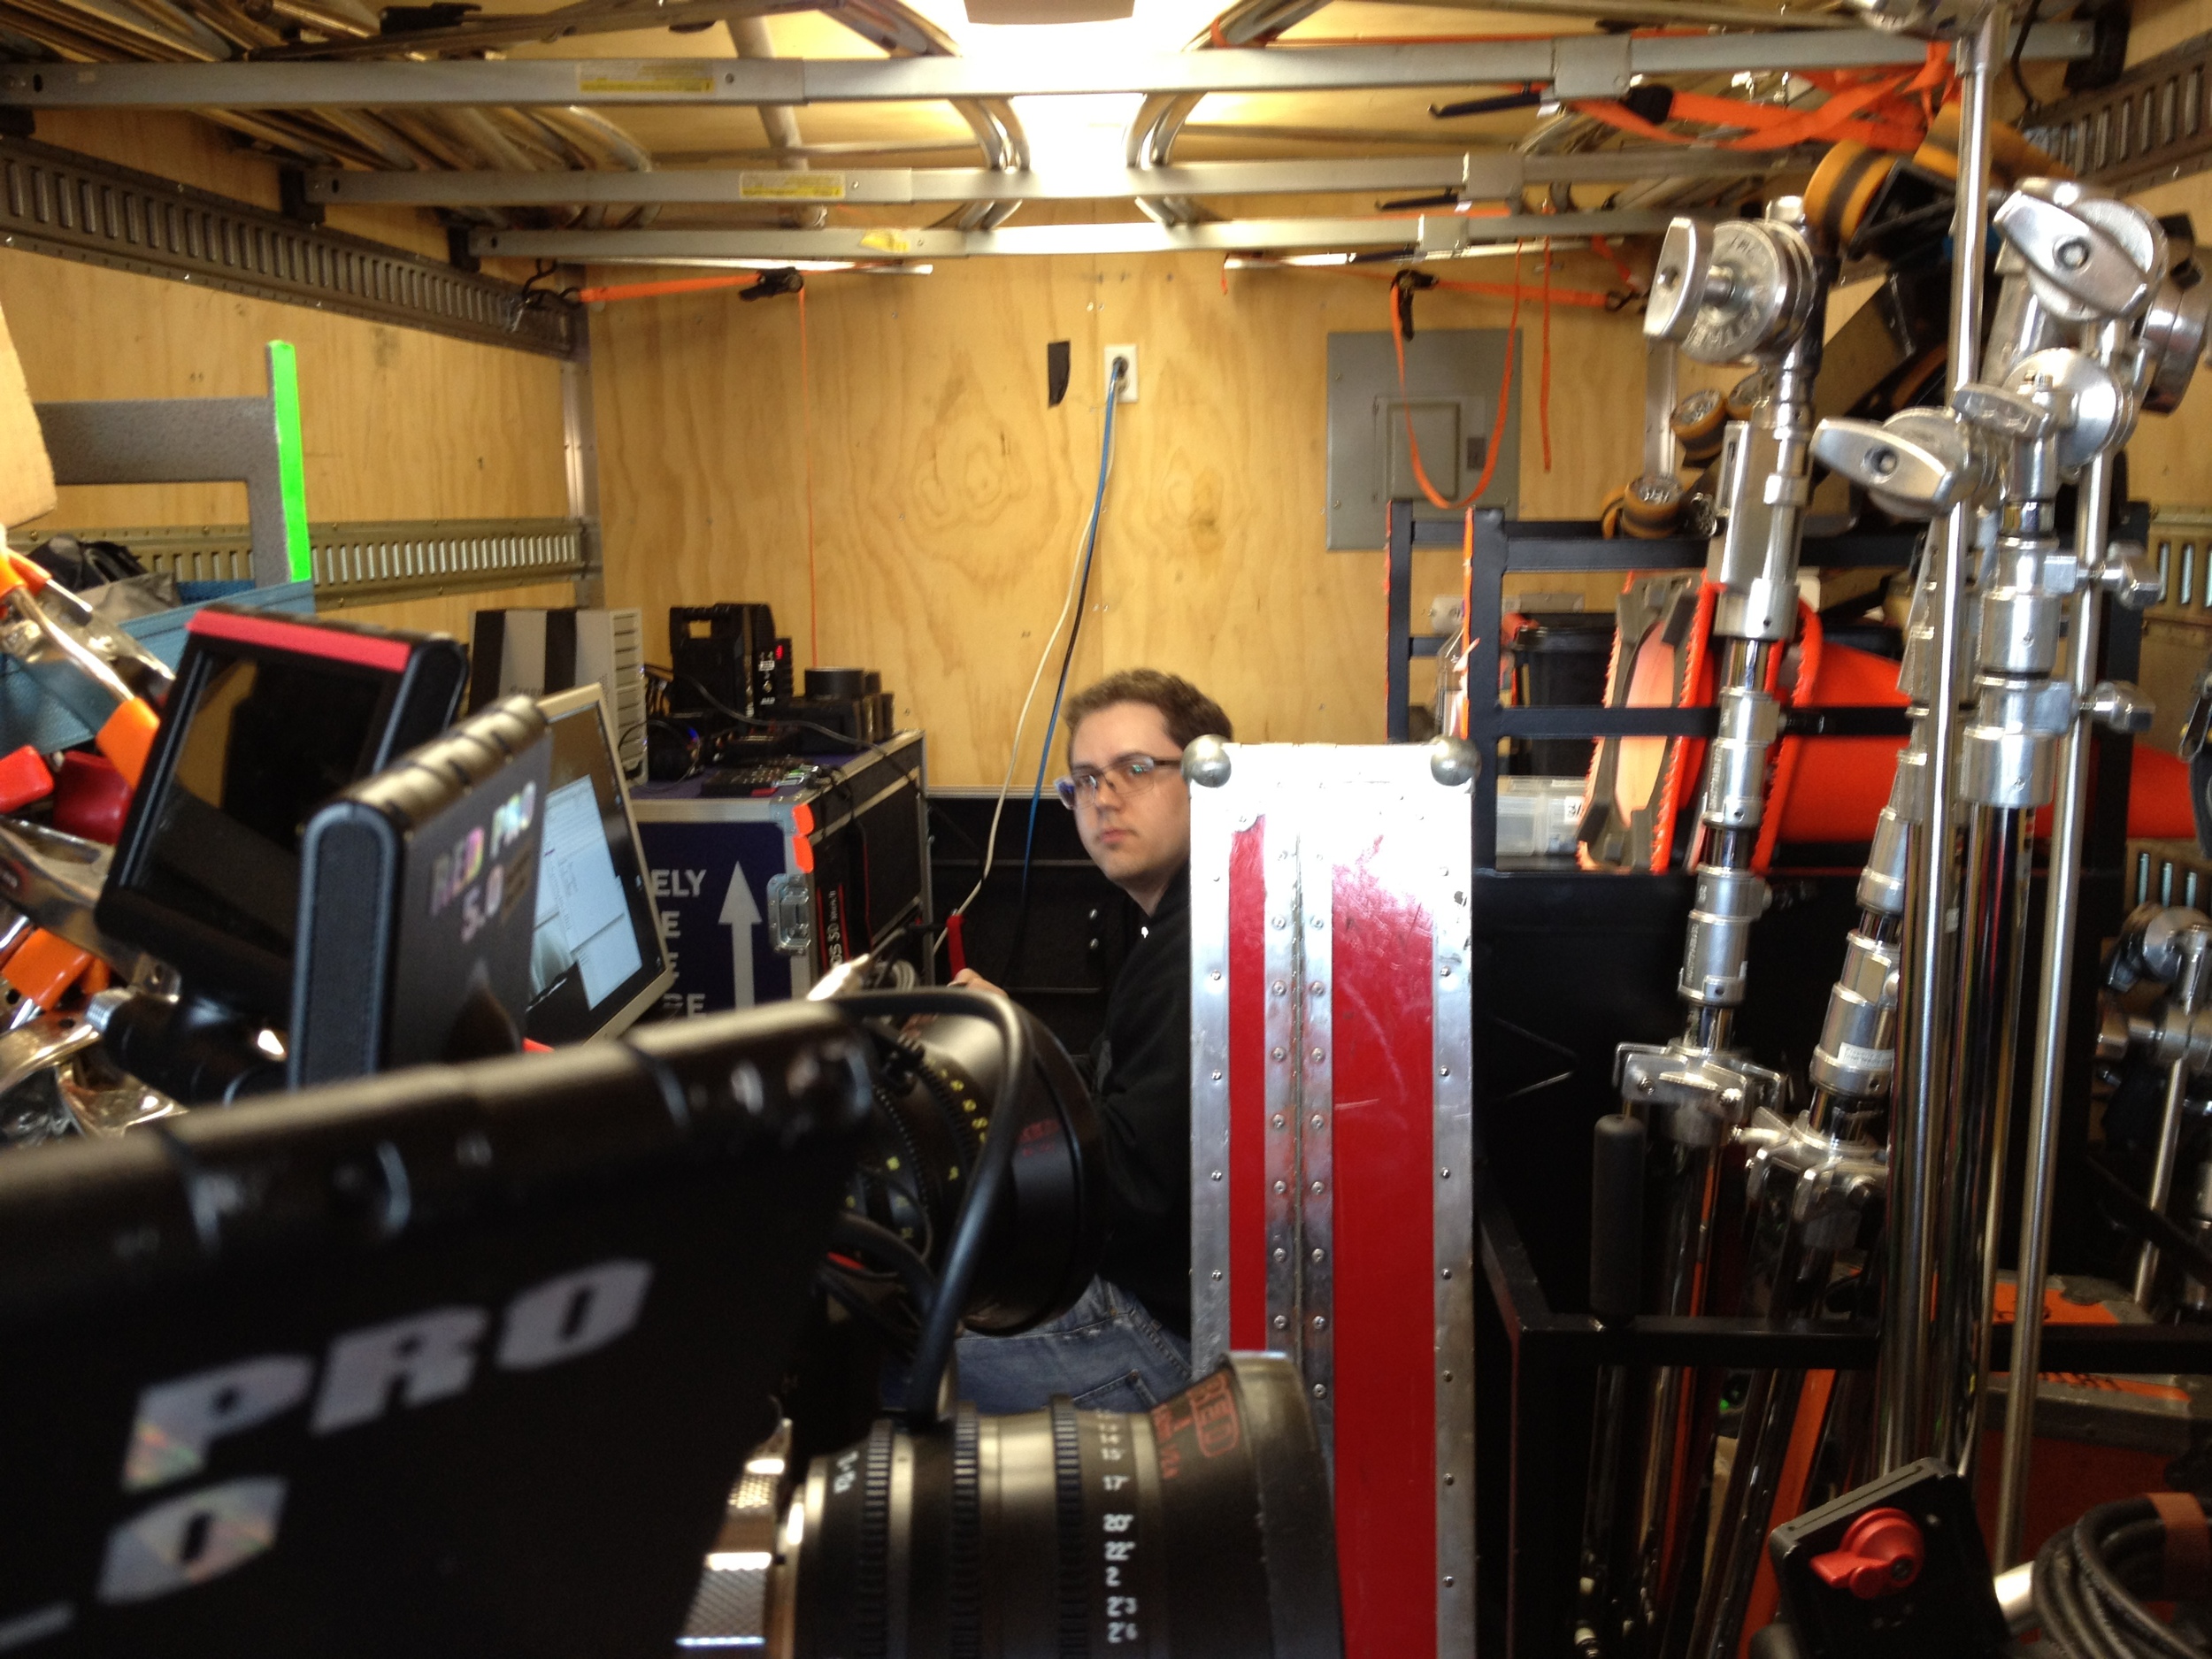
​DIT station in the back of the grip truck

I was acting as the production DIT and Visual Effects Supervisor. As such, I was responsible for not only backing up footage, but attempting to stitch as many shots as possible while we still had the opportunity to reshoot them should there be an issue with a given setup.

Since nearly all of our prep time went to assembling the camera rig, we didn’t have much of an opportunity to customize our DIT station. I was able to make sure the system arrived with a large e-sata raid, additional e-sata ports for the Red Stations, and a Red Rocket card for realtime processing. The only software I had an opportunity to load aside from AfterEffects was a tethering app for my iPhone, allowing me to download software in the field as needed [8].

This being essentially an “out of the box” Mac Pro, it was outside our firewall and unable to connect to our license server running Nuke. Our composites were to be finished in Nuke, but stitching on site was only possible with our local copy of AfterEffects, resulting in some rework for me later and a few inconsistencies between on-set results and the final composites.

All backups were performed with R3D Data Manager and all dailies were created with RedCine X. For the dailies, I selected the best take of a given setup, and created a full resolution, 5K JPEG image sequence from each camera.

The JPEG sequences were immediately imported into AfterEffects and undistored with the help of the lens grid charts. Since we used limited focal lengths during shooting, I was able to reuse lens distortion data to speed up the stitching process from shot to shot, getting the undistored plates “close-enough” for a quick and dirty composite. Imperfect lens correction was acceptable at this point because stitching on set was only for the purpose of checking parallax errors and determining if we would be able to hide issues in the final composite.

When I felt I had a composite that was good enough and would be easy to finalize in Nuke with a proper amount of attention, I rendered a 3,680 x 540 H264 file to watch (repeatedly) at full screen on the 30’’ Apple Cinema Display. When the Director, Producer, and DP had bought off on the successful stitch, I moved on to the next shot, while continuing to download, transfer, and render in the background. When our four day production ended, we had nearly 4Tb of data, consisting primarily of the raw camera backups.

The largest obstacle to overcome for the DIT work was my physical location. Since we were on a secure construction site with a minimal number of escorts, the most pragmatic location for the DIT station was in the back of the grip truck, traveling with the crew. Our grip truck is equipped with an on-board generator, but this meant I was unable to charge batteries or backup footage overnight [9], and since we had contractors working in our crew, we were held to a strict 10 hour day [10].

Another frustration for DIT work was the cold temperature in the back of the grip truck. If you’ve never been to a desert like Phoenix in the winter, you probably wouldn’t assume the temperature drops as low as it does. Construction shifts begin early and so did we. Our call time each day was pre-dawn and the temperature was in the 30s. The days warmed up around midday, but the shaded location for the metal Mac Pro typically stayed around 50 degrees Fahrenheit.

I bring up the cold mornings not as a complaint about uncomfortable conditions, but because extreme temperatures affect electronics. The DIT station was built into a rolling shipping container, designed specifically for working in the field. That was great for portability, but it made the swapping of components incredibly difficult, specifically the main surge protector that powered the system. Each day, the device that had worked perfectly in our warm office the week before, refused to power up on the first three attempts. On the fourth, the system would boot and remain on all day, but it was certainly a scare that we didn’t need each morning.

Along with the surge protector, the monitor occasionally obscured the images with a snowy noise not unlike an old analog television. My assumption at the time was the graphics card had come loose during travel and needed to be adjusted in its slot. A reboot and a jiggling of the DVI cable seemed to resolve the issue each time it occurred.

In the recent weeks, this system was still exhibiting some odd behavior. After the graphics card was swapped to no avail, the system was sent back to Apple for further investigation. They were able to determine the fault lied with the electronics in the 30’’ Cinema Display, not the graphics card. Additionally, they found a crack in the motherboard of the Mac Pro which occurred on the shoot, proving just how lucky we were to even finish the project.

​Monitor problems

The Edit

At the time of production, Intel Studios’ primary NLE was Final Cut Pro 7. One limitation in FCP7 is its inability to edit projects with a resolution above 4K. We built a custom project template inside of Final Cut, allowing us to edit in 4K and transfer the project to AfterEffects for finishing at full resolution, but it was overly complicated and introduced many opportunities for failure.

As a result, we took this opportunity to audition Adobe Premiere Pro CS 5.0 as a replacement NLE [11]. Premiere offered us the ability to create a project at our full, final resolution of 7,360 x 1,080. With the aid of another Red Rocket card, the editor was able to assemble the project from the full resolution R3D files.

At the same time, I created EXR and JPEG sequences of the selected panoramic takes and created the final stitched composites in Nuke. Ninety percent of the compositing was done with the JPEG sequences to ease the load on the CPU and our network. This became especially important when we found the best results were generated by using camera re-projection in Nuke’s 3D environment, and photographing the 3D composite at the full 7K resolution. While this technique slowed the compositing process compared to a traditional 2D composite, the time was reclaimed when we were able to reuse the 3D camera re-projection rig, again thanks to our limited number of focal lengths used on set. Before rendering, the JPEG sequence was swapped for the EXR sequence and final color matching of the three cameras was adjusted.

When a shot was completed it was again rendered at 3,680 x 540, this time in ProRes HQ, and scrutinized on a 30’’ computer monitor. Once approved, a 7,360 x 1,080 TIFF sequence was sent to the editor for integration into the video.

How To Build A Better Rig

If we were to attempt such a project again (hopefully with a bit more time and money) I’d be very interested to test the potential use of a Stereo3D beam splitter camera rig.

While it’s certainly not designed for this purpose, using a stereo rig set to zero interaxial distance and adjusting convergence to pan the second camera, I think we could design a panoramic video rig that would be much more forgiving with parallax errors, and create better looking final images. Additionally, if we were able to remove the majority of the parallax errors by getting the sensors closer together, the use of two cameras instead of three might be feasible.

So, How Did It Look?

After all the production hurdles we encountered, I must admit, seeing 160 foot wide, 7K+ panoramic video was beautiful. More importantly, the crowd and the customer loved the video. It’s hard to ask for more than that.

The Crew

By now, one thing that should be patently obvious is that the success of this project was due entirely to our dedicated and talented crew. I would be remiss if I did not recognize them here:

Writer/Director: Roland Richards

Producer(s): Charlyn Villegas, Keith Bell

Director of Photography: Jeff Caroli

1st AC: Josh Miller

DIT/Compositor: Dan Sturm

Editor: AJ Von Wolfe

Music by: Karlton Coffin

And additional thanks are in order for Keith Bell who both commissioned this writeup and offered editorial guidance.


Photo Gallery


  1. Intel Studios is an internal media team within Intel® Corporation.  ↩

  2. In the name of disclosure, I must inform you that, as of March 2013, I am no longer an employee of Intel® Corporation.  ↩

  3. 14 nanometer process technology, to be more specific.  ↩

  4. For a practical demonstration of how sensor size affects Field of View, check out this awesome web app from AbleCine http://www.abelcine.com/fov/  ↩

  5. Technically the Red Epic sensor is slightly larger than Super–35, measuring 27.7mm (h) x 14.6mm (v) versus Super–35’s 24.9mm (h) x 14mm (v).  ↩

  6. A very long story for another time.  ↩

  7. We immediately purchased a replacement LCD for the rental house. Sorry Jason and Josh!  ↩

  8. I do not recommend this solution, even if you have an unlimited data plan. Talk about unreliable.  ↩

  9. The construction site, until completion, was the property of the construction company. Despite being an Intel facility, we were guests and required to abide by a great many rules regarding safety. Leaving an unattended generator running in a truck overnight was not allowed.  ↩

  10. When you factor in security briefings, the inability to leapfrog setups, and waiting for construction cranes that cannot be directed, 10 hours is much less time than you’d think.  ↩

  11. Since development of FCP7 had been abandoned by Apple in favor of the replacement product FCPX, we were already in the market for a new NLE.  ↩

"Send With Gmail" Service for OS X

Do you ever need to send an email, but hate the thought of opening Gmail and seeing an inbox full of expectations?

On this week’s episode of Systematic, Merlin told Brett how much he enjoys using Drafts on iOS to quickly send an emails to solve exactly that problem. He also mentioned there isn’t an easy way to achieve the same thing on the Mac. Since I wanted such a tool to exist, I decided to take a whack at it and see what I could come up with.

I thought the best fit for such a tool would be a system service. As much as I still enjoy using TextExpander to process text, copying the email content to the clipboard and typing a snippet is inelegant and leaves room for error. A system service can be called from pretty much any application with a quick keyboard shortcut of my choosing. Besides, I’ve never created a system service before and where’s the challenge if I don’t try something new?

How Does it Work

Like Drafts, it uses the first line of input as the subject of the email and lines three through the end for the body, assuming you’ll leave a blank line between the subject and body. Optionally, you can launch an empty Gmail message by using your key command with an empty selection [1].

The service uses Gmail’s URL syntax which allows fields to be prepopulated in the address bar. It’s the same idea behind the YouTube URL scheme that allows you to do things like link to a specific time in a video. For my purposes I would need the syntax for subject, body and opening the compose window in full screen [2]. As it happens, those URL parameters are as follows:

subject: su=
body: body=
full screen compose: fs=1

Just like YouTube, these parameters are concatenated with an ampersand, creating a URL that looks like this:

https://mail.google.com/mail/?view=cm&ui=2&fs=1&tf=1&su=SUBJECT&body=BODY

When using the service, you can compose your message in any application, then, when you’re ready to send it, select the text and hit your keyboard shortcut. As long as you’ve previously logged into Gmail in your browser, you’ll be taken directly to a full-screen compose window awaiting your recipient’s email address. And even better, after you hit send, you won’t be taken back to your inbox.

Limitations

This being the complete hack that it is, there are some limitations to the service.

First, it’s plain text only. Since the content of the message passes through the location bar of your browser, there’s no way (that I can tell) to pass rich text. My hope was to be able to write emails in Markdown and process the text before sending, but as of yet, I haven’t been able to figure out how to make that happen.

EDIT 2013-03-11: As luck would have it, it seems our friend Brett Terpstra, with the help of Tobias O'Leary, has solved this particular problem for us.

Second, and this is a big one, there is a limit on the length of the email. It may sound like a deal breaker, but in practice it’s not as inconvenient as you might imagine. Because this hack uses a URL to pass the email information, we’re limited by the maximum URL length supported by the browser. Yes, there is a maximum URL length.

In my testing, I found the maximum length of a working URL was 1465 characters. The result was the same for both Chrome and Safari. Since the service is adding extra characters to the email content in order to create a functioning URL, the length of the actual email content is limited to around 1350 characters.

It’s a bummer that this limitation exists, but if you’re writing a longer email and you’d still like to avoid your inbox, I suggest launching a blank Gmail message (as mentioned above) and composing your message in the browswer or using the service with only the subject line selected and pasting in the body text manually [3].

Download

Download: Send With Gmail service for OS X

The Code:

If you’d like to tweak the code or use it in another way, here it is.

#!/bin/python

import sys
import re
import subprocess
import urllib
from sys import stdin, stdout

tinput = stdin.read()

def subject_sel(s):
    line_list = re.split('\n', s)
    sub_final = line_list[0]
    return sub_final

def body_sel(b):
    line_list = re.split('\n', b)
    body_final = "\n".join(line_list[2:])
    return body_final

full_url = "open https://mail.google.com/mail/?view=cm&ui=1&fs=1&tf=1&su=" + urllib.quote(subject_sel(tinput)) + "&body=" + urllib.quote(body_sel(tinput))

process = subprocess.Popen(full_url.split(), stdout=subprocess.PIPE)
output = process.communicate()[0]

  1. You will need to be in a text field of some sort for the command to work. This can be in any location of any application that accepts text.  ↩

  2. It appears the full screen parameter is added automatically when creating an email with a prepopulated subject and body.  ↩

  3. Like an animal!  ↩

CMMA - A Panel Discussion on Stereography

Back in April of this year, I was asked to speak on a panel about Stereoscopic 3D production at the Communications Media Management Association's Spring Conference in Redmond, Washington.

The panel consisted of Adam Green from Avid Technology, Keith Vidger from Sony, Amir Stone from the Adobe AfterEffects development team, and myself.

The audience, as you can see from the live polls at the beginning of the video, was essentially brand new to the topic of S3D, so the discussion ranged from a basic introduction to stereo nomenclature and workflow, to on-set learnings and insight (primarily my focus).

I think it turned out pretty well, and now it's online, so check it out.

Experiments in iSight Scripting

A week or two ago, a conversation with my girlfriend reminded me of this old video from the Defcon 18 Conference, in which a hacker by the name of Zoz recounts the tale of how he located and recovered his recently-stolen computer by way of some fancy Internet skills. In addition to being a great reminder about data safety and security, it’s a pretty damn funny story.

Re-watching the video reminded me I’ve always wanted to experiment with scripting the iSight camera on my MacBook Pro. Not necessarily for the purpose of having photo evidence in the event of a theft, but more as a fun exercise in scripting and automation. Maybe I’m easily entertained (rhetorical), but I found the process and results throughly enjoyable.

Command Line Tools

The first thing I needed was a command line interface to the iSight camera. Despite my best Googling efforts, I wasn’t able to find any native OS tools to fire the camera (I’m still not sure if there is one). But lucky for me, nearly every search I did pointed me to a free, no-longer-supported-but-still-functional CLI tool called iSightCapture. Installation is as simple as tossing it into /usr/local/bin.

Regarding syntax, here’s the pertinent information from the iSightCapture readme file:

isightcapture [-v] [-d] [-n frame-no] [-w width] [-h height] [-t jpg|png|tiff|bmp] output-filename

Options
-v output version information and exit
-d enable debugging messages. Off by default
-n capture nth-frame
-w output file pixel width. Defaults to 640 pixels.
-h output file pixel height. Defaults to 480 pixels.
-t output format - one of jpg, png, tiff or bmp. Defaults to JPEG.

Examples
$ ./isightcapture image.jpg
will output a 640x480 image in JPEG format

$ ./isightcapture -w 320 -h 240 -t png image.png
will output a scaled 320x240 image in PNG format

Triggering

I wanted the ability to remotely trigger the iSight camera from my phone, and have it run for a predefined interval of time. To do this, I’d use a watch folder and a trigger file, uploaded from my phone, to initiate the script. This would theoretically be the method I’d use to “gather photographic evidence” in the event my laptop is stolen.

As usual, to set this up, I turned to my trusty friend Dropbox. To keep things tidy, I needed a couple of folders. The directory structure looks like this:

  • iSight_backup
    • scripts
    • trigger

The photos taken by the script will be placed in the top level directory, iSight_backup. The script itself would be placed in the scripts folder, and the trigger folder remains empty, awaiting a text file to be uploaded via Dropbox on my phone.

The Script

Here’s the script, called isbackup_t.bash, and saved into my iSight_backup/scripts/ folder:

#!/bin/bash  

#   path to iSightCapture CLI tool  
APPP="/usr/local/bin/isightcapture"  

#   path to Dropbox folder to receive photos  
FPATH="/Path/To/Dropbox/iSight_backup/" 

#   path to trigger file  
TPATH="/Path/To/Dropbox/iSight_backup/trigger/"  

#   select photo filetype; jpg, png, tiff, or bmp  
XTN=".jpg"  

#   number of photos to take  
PNUM="24"  

#   interval between photos (seconds)  
PINT="300"  

for i in `seq 1 $PNUM`;  
    do
        DTS=$(date -u +"%F--%H-%M-%S")  
        $APPP "$FPATH$DTS$XTN"  
        sleep $PINT  
    done  

rm $TPATH*  

The Details

Each photo gets a date and time stamp added to the file name for easy sorting. Since the FPATH destination is set to a folder within my Dropbox, and each file is a 640x480 jpeg, approximately 25kb in size, I can see the resulting photos on my phone just seconds after their taken.

By setting PNUM to 24, and PINT to 300, the script will take a photo every 5 minutes, for the next 2 hours, then stop until I upload another trigger file. However, since the script itself lives in Dropbox, I can change the interval or duration variables from my iOS text editor at any time.

Tying The Room Together

All that’s left to complete our little project is to create a launchd task to keep an eye on our trigger folder, and fire up the script if anything lands inside. Since creating, modifying, or using launchd tasks via any method other than a GUI is currently beyond me, I turned to Lingon.

Here’s the resulting launchd task:

<?xml version="1.0" encoding="UTF-8"?>
<!DOCTYPE plist PUBLIC "-//Apple//DTD PLIST 1.0//EN" "http://www.apple.com/DTDs/PropertyList-1.0.dtd">
<plist version="1.0">
<dict>
    <key>Label</key>
    <string>isbackup triggered</string>
    <key>ProgramArguments</key>
    <array>
        <string>bash</string>
        <string>/Path/To/Dropbox/iSight_backup/scripts/isbackup_t.bash</string>
    </array>
    <key>QueueDirectories</key>
    <array>
        <string>/Path/To/Dropbox/iSight_backup/trigger</string>
    </array>
</dict>
</plist>

And just like that, we’ve got a setup that will monitor our trigger folder, fire up our script when it sees anything inside, and save each file to our Dropbox.

Extra Credit

During my research for this project, I found a number of people using iSightCapture for things other than a makeshift security tool. Some, for example, used it to take a self portrait at login every day and auto-upload it to an online photo diary.

I thought that was a fun idea, so I wrote a second, shorter version of my script to automatically take a shot every 2 hours without the need for a trigger. For my version, however, I was most definitely not interested in auto-uploading the photos.

The script:

#!/bin/bash

APPP="/usr/local/bin/isightcapture"
FPATH="/Path/To/Dropbox/iSight_backup/"
DTS=$(date -u +"%F--%H-%M-%S")
XTN=".jpg"

$APPP "$FPATH$DTS$XTN"

And the launchd task:

<?xml version="1.0" encoding="UTF-8"?>
<!DOCTYPE plist PUBLIC "-//Apple//DTD PLIST 1.0//EN" "http://www.apple.com/DTDs/PropertyList-1.0.dtd">
<plist version="1.0">
<dict>
    <key>Disabled</key>
    <false/>
    <key>KeepAlive</key>
    <false/>
    <key>Label</key>
    <string>IS Secuirty</string>
    <key>ProgramArguments</key>
    <array>
        <string>bash</string>
        <string>/Path/To/Dropbox/iSight_backup/scripts/isbackup.bash</string>
    </array>
    <key>QueueDirectories</key>
    <array/>
    <key>RunAtLoad</key>
    <true/>
    <key>StartInterval</key>
    <integer>7200</integer>
</dict>
</plist>

Since I typically use a multiple monitor setup when working, I almost never see the green light come on when the script runs and when I check the photo directory, usually the beginning of the next day, I’m treated to at least a couple hilarious images. Like these, for example:

Hi Merlin!

I may be asleep in this photo. I can't tell.

No, that's not my poster. My girlfriend got to decorate that side of the room.

Yes, It makes Skype calls awkward. Then again, so does that hair.

Cleanup

Despite the photos being almost inconsequentially small in file size, I really don’t need to be keeping a long-running historical record of my disheveled appearance. To keep things from getting unwieldy, I created a Hazel rule that deletes files older than 2 weeks. I see no reason I’d need to keep them any longer than that.

Why?

I don’t know if it’s because this little project was so different from my day to day work, or I thought it would be a genuinely useful security tool, or I’m a narcissist that loves seeing pictures of himself (again, rhetorical), but I had a blast playing around with this little project.

As with nearly everything on this blog, I learned some things, failed a few times, and came out the other side with a fun little script I can demo to people, making it absolutely certain they’ll never ask me anything about computers again.

Converting MultiMarkdown to HTML with TextExpander

If you’re here, reading this site, chances are pretty good that you use and love MultiMarkdown as much as I do. That, or you’re at least fairly curious and have a plenty of free time.

With more and more applications supporting Markdown natively, the need to convert the text to HTML is decreasing in frequency. However, the need isn’t completely gone. Sometimes you just need some good old fashioned HTML.

A Hammer For Every Season

(Or Some Other Metaphor That Actually Makes Sense)

There are almost as many ways to get your MultiMarkdown into HTML as there are applications that support Markdown.

I’ve created build systems for Sublime Text to convert MultiMarkdown documents to HTML files. I’ve got a build system that lets Marked do the heavy lifting for me. For the times I don’t need a full MultiMarkdown document, just a small snippet of text, I’ve got Brett Terpstra’s killer MultiMarkdown Service Tools.

It’s probably due to the myriad of tools at my disposal that I only recently discovered I’m unable to use Brett’s OS X Services in Sublime Text 2. I’ll admit, I didn’t try very hard, but after Control + Clicking, trying my keyboard shortcuts, and doing a bit of searching online, I quickly gave up and decided to build a tool I knew would work.

To TextExpander We Go!

When I need a system-wide tool that works in any application, activated by a few quick keys, the answer is almost always TextExpander. With its ability to act as an intermediary between text and scripts, TextExpander is the hammer that always gets the job done [1].

The snippet:

#!/bin/bash
pbpaste | /usr/local/bin/mmd

Just like my other text processing scripts, proper use involves selecting the text to be processed, copying it to the clipboard, and invoking the snippet, which I’ve bound to the command ;mmd. Now, any time I need to convert MultiMarkdown text into HTML, without the hassle of saving files and opening specific applications, I’ve got a quick, universal keyboard command I can use. Bringing me one step closer to an application agnostic workflow.

Hooray!


  1. Yes, I’m sticking with the hammer metaphor. I’m in too deep to turn back now.  ↩

Running Scripts with TextExpander

I love that the Internet is full of smart people making and sharing awesome things. Like Dr. Drang and his Tidying Markdown Reference Links script. Seth Brown’s formd is another great tool I don’t know how I ever lived without. But, being the amateur that I am, I always struggle to figure out just how to use the scripts these amazing programmers have been kind enough to provide.

Lucky for me (and you), I’m able to play along with the help of everyone’s favorite writing tool, TextExpander. In the documentation for formd, Seth was gracious enough to spell it out for us laypersons[1].


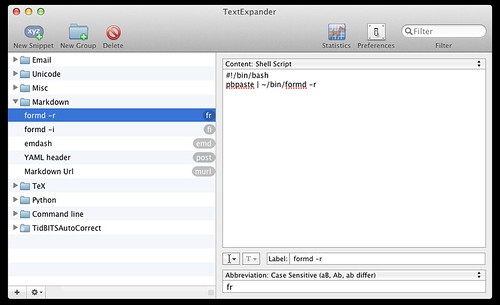
To run formd with TextExpander, simply place the Markdown text to convert onto the clipboard and issue the appropriate TextExpander shortcut (I use fr or fi for referenced or inline, respectively).

It took longer than I’d like to admit, but eventually I realized this snippet could be tweaked to run any script I happen to download from a coder more skilled than myself. Additionally, since most of the scripts I want to use are built for processing text, the copy/paste activation generally works great.

#!/bin/bash
pbpaste | python /Path/To/Your/Script/script.py

With this short snippet, I can copy my text to be processed, invoke the script snippet of my choosing, and have the results immediately pasted back into my text editor, email, or wherever.

This particular snippet assumes you’re running a python script, but you can just as easily swap python for ruby or perl. Or you can omit the python call if you’re just running a standard Bash command. As long as it’s a valid command that would run in the Terminal[2], you can automate it this way. And, just as with formd, to use the snippet, you simply Copy the text to be processed, and invoke the snippet.

Boom. Done. Life is grand.

While none of this is new or revolutionary, connecting the dots between TextExpander and the Terminal is something I wish I’d have discovered long ago and, therefore, may be of interest to you.

Of course none of this would be possible without the amazing minds that write the scripts in the first place. So, along with this post, I offer a sincere Thank You to Dr. Drang and his site And now it’s all this, as well as Seth Brown and his site Dr. Bunsen.


  1. Layfolk? Laypeople? Missing the point?  ↩

  2. And frankly, I just start trying things in the Terminal until I find the correct command.  ↩

Fountain for Sublime Text

Jonathan Poritsky has created a great Fountain package for Sublime Text. It supports almost everything outlined in the Fountain syntax guide but, most importantly, gives us syntax highlighting.

While not everyone likes the idea of using colors to highlight elements in their screenplay, I most definitely do. For me, syntax highlighting is equivalent to the red squiggly line underneath a misspelled word. At a glance, I can see if I've made any errors and, to a lesser degree, I can recognize patterns of highlighted elements to quickly understand where I am in the overall document.

Another reason I want syntax highlighting is to ease my recent transition to full-time use of Fountain for screenwriting writing projects, replacing my roll-your-own MultiMarkdown screenplay syntax.

The Part Where I Ruin Everything

Hands down, my favorite part of Jonathan's Fountain package is its ability to be customized, like all Sublime Text packages. The default package theme does a good job of emulating the look of a screenplay, using layout settings like 15pt black Courier on a white background and centering the text within the document window, etc.

While I enjoy reading screenplays in their correct format, I really dislike that layout during the writing process. I much prefer to look at white text on a black document. More specifically, I use the Sunburst theme in Sublime Text while writing in MultiMarkdown. Since Fountain is designed specifically to be platform and application agnostic, I'm free to be as picky as I want about my writing environment.

So, I tweaked the theme that came with the Fountain package. The biggest thing I wanted to add was background highlighting for Scene Headings. It helps me quickly scan the document to find the beginning of a given scene.

I made all Scene Headings, Action, Character, and Dialogue elements white(ish), and Parentheticals, Sections, Synopses a dimmer grey color to help them fade into the background a bit. The only elements that use colored text are Transitions, Notes, and the Title Page, which uses the same color scheme as MultiMarkdown metadata in the Sunburst theme.

In Fountain.sublime-settings I removed the additional line padding, changed the font to Monaco 11, turned on line numbering, and turned off "draw_centered". What I'm left with is a document that looks nothing like a screenplay, just the way I like it.

Personally, I don't want to feel like I'm writing a screenplay. Writing a screenplay is hard and stressful. Conversely, writing words into a text editor is something I can do all day long. Maybe some day I won't be so particular or need to psych myself out in order to write, but for now, this feels right to me and I'm sticking with it.

If for some reason you would like to use my theme, download this file and drop it into the Fountain folder in your Sublime Text package directory. Once you've done that, open up Fountain.sublime-settings and make yours match mine:

{  
    "extensions":  
    [  
    "fountain"  
    ],  
    "font_face": "Monaco",  
    // "font_face": "Courier Screenplay",  
    // "font_face": "Courier Final Draft",  
    "font_size": 11,  
    "color_scheme": "Packages/Fountain/Fountain Dan.tmTheme",  
    "word_wrap": true,  
    "wrap_width": 78,  
    // "line_padding_top": 5,  
    "draw_centered": false,  
    "spell_check": true,  
    "indent_subsequent_lines": false,  
    "trim_automatic_white_space": true,  
    "line_numbers": true,  
    "translate_tabs_to_spaces": true,  
    "auto_complete_commit_on_tab": true,  
    "auto_complete_with_fields": true  
}

Launching Marked from Sublime Text 2

I do pretty much all my MultiMarkdown writing anymore in Sublime Text 2. I’ve come to rely on Marked for previewing my files with a variety of custom CSS files, depending on the type of project I’m writing.

At the moment, the most annoying part of this workflow is the time it takes to open Marked and locate the MultiMarkdown file I’m currently working on in Sublime Text. I think I’ve been spoiled by the speed of using Sublime Text’s Goto Anything feature (Command + P) for opening files.

To speed things along, I wrote a new build system for Sublime Text that launches the active document in Marked. Now previewing my active file is as easy as invoking the build command which, for me, is still Command + B.

The (insanely simple) code [1]:

{  
"shell": "true",  
"cmd": ["open -a marked \"$file\""]  
}  

More non-rocket-science, but a big time saver in my world.


  1. This build system is only for OS X.  ↩

Automated FTP upload with Hazel via Bash

A couple weeks ago Macdrifter had a nice post about automating FTP uploads with Hazel, Dropbox, and Python. It’s a similar idea to the setup I’ve been using to automate my MultiMarkdown workflow, but the main reason it grabbed my interest was this line:

I really like Transmit for FTP, but it seemed a little heavy handed for Hazel automation.

He’s right. Using Transmit for the FTP portion of my process was a poor decision. It just happened to be the only way I knew how, and scripting the FTP upload didn’t even occur to me at the time (there’s a reason for the name of this site).

After reading his post, I decided to swap out the slow and clunky Transmit portion of my Hazel rule with some fancy code. One problem. I don’t know anything about Python[1], and the 3 hours I spent trying to get up to speed were futile and fruitless.

Since I’ve dabbled a bit with Bash, I decided to see if there was an equivalent way to accomplish the same tasks. After a bit of searching, and a lot of trial and error (again, read the name of the site), I came up with this:

HOST=ftp.DOMAIN.com  
USER=myUserName  
PASS=myPassword  

JNAME= \ basename $1\  

ftp -inv $HOST << EOF  

user $USER $PASS  

put "$1" "$JNAME"  

EOF  

echo "http://dansturm.com/$JNAME" >> /Users/PATH/Dropbox/PATH/UPLOADS_LOG_FILE.txt

It’s faster than the Transmit method. It works more often than the Transmit method. And it even records the URL of the uploaded file to a text file in my Dropbox (my favorite idea from the Macdrifter post). I also have the Hazel rule change the file name to all lowercase and swap spaces for underscores, something is already performed in my Text to HTML conversion rule, but now the FTP rule can be used stand-alone as well as in conjunction with the MultiMarkdown process.

It has no error reporting, and you can’t even really tell it’s running (save for the evidence in the log file), but it’s way better than what I was using. Many thanks to Macdrifter for this one.

But…

I’m happy I was able to improve my exiting tools, and learn a few things in the process, but now that I’ve migrated this blog to Squarespace, I’m not sure how much I’ll actually use them considering Squarespace doesn’t support FTP access, and my home site doesn’t need updating very often.


  1. Okay, I know some Python, but only enough to customize the interface in Nuke and build some basic gizmos and comp tools.  ↩

Creating Linked Images with TextExpander

I have a TextExpander snippet for creating Markdown links. I have one for creating Markdown images. Both pull a URL from the clipboard.

On occasion I’ve used them in combination to create images that are linked to the, usually larger, original images. I don’t know why it’s taken me this long to create a single snippet to do this one task, but a recent project filled with high-rez images necessitated such a tool.

For this particular project, I’ve also used a fill variable to add a description to the image. Not rocket science, but just another tool to save myself a lot of time and frustration.

The Snippet:

[![%fill:description%](%clipboard) %fill:description%](%clipboard)

SP-MMD Cheaters

Since Brett Terpstra gave us Cheaters, I’ve been populating the app with the various tools I use frequently.

I’ve finally gotten around to creating a cheat sheet for my MultiMarkdown Screenplay syntax. I expect it to be used by precisely one person. Me.

However I’m posting it here to serve as a shorter explanation of the way I write, to spare you from reading the whole back story. It uses the same modified CSS file I created for the Fountain cheet sheet.

Here’s the SP-MMD Cheaters page.

And here’s the cheat sheet in a web-friendly view for curious passers-by.

My Hazel CMS

It should be no surprise to anyone familiar with the app, that Noodlesoft’s Hazel is amazing. Today I setup an automated system using Dropbox, Automator, and Hazel to process MultiMarkdown documents into HTML, give them web-ready filenames, and upload them to my website.

Everything on this site starts as a MultiMarkdown text file. I preview the page in Marked, and when its ready to go live, I save a copy of the file in a folder called _1_ready_, which has 3 Hazel rules applied.

Ready

First things first, the text file needs to be converted to an HTML document. I’ve used the Run Shell Script action to call the mmd command.

Pretty straight forward. To add some flexibility, the second Hazel rule for the _1_ready_ folder checks for changes to preexisting text files, and processes them using the same bash script. That saves me from having to delete and re-copy a file to make an update.

The last rule for the _1_ready_ folder renames the HTML file, making it entirely lowercase, replaces the spaces with underscores, and moves the new file to a folder called _2_go_.

It’s important to make sure the name element in the with patern: section is set to lowercase, and the replace text dialog is used to swap the spaces for underscores.

Go

The _2_go_ folder automatically uploads any file it finds to the root of my site. As with _1_ready_, the final files are left in the folder to more easily make changes later. Additionally, I keep a copy of my Blog index page and rss XML in the _2_go_ folder so I can quickly update the main page with links to the new posts.

To upload the files, the Hazel rule calls an Automator Workflow that uses the Transmit [1] upload action to log into my site (stored as a favorite), and drop everything in the root folder, overwriting files if necessary.

Dropbox

The best part about this whole workflow is Dropbox. Both the _1_ready_ and _2_go_ folders are in my Dropbox, giving me the ability to drop in files from my iPhone, iPad, etc. With apps like TextExpander and Nebulous Notes, there’s no reason I can’t create, and post entirely from an iOS device. Obviously I’ll need a Mac, running and online, but the flexibility of this workflow is well worth the cost of a dedicated system.

Needless to say, I’m incredibly excited to have this new capability, and I can’t wait to see what other workflow magic I can create with Hazel


  1. Many thanks to Macdrifter for recommending Transmit. I love this app.  ↩

Update: I've since revised my upload method to use a Bash script, rather than Transmit. It's much faster and more efficient, so if this idea interests you, you should definitely check it out.

MultiMarkdown Build Systems for Sublime Text 2

When I started using Sublime Text 2 as my primary text editor, last year sometime, I created a build system to more quickly process my MultiMarkdown files. Since I couldn’t find a preexisting MultiMarkdown build system in the Sublime Text forum, it’s probably a safe bet that others might find it useful for me to post mine.

Since all of my writing is based on MultiMarkdown and varying CSS files, I use the same build system for screenplays, blog posts, presentations, etc. When I created the initial build system I was doing the majority of my writing on a Windows 7 machine. Since that time, I have retired all of my Windows computers [1] and created a new build system for OS X (10.7.3).

Here are both build systems:

OS X

{
"shell": "true",
"path": "/usr/local/bin",
"cmd": ["mmd \"$file\""]
}

Windows

{
"shell": "true",
"cmd": "multimarkdown -b \"$file\"",
"cmd": "\"\"${file/\\.txt/\\.html/}\"\""
}

The last line in the Windows build system is a launch command that will open the processed document in your default HTML application. Since I have Marked on my Mac, I decided to omit the launch command from the OS X version and pick my viewer on a per-file basis.


  1. For a number of reasons, I’m still required to use a VM of Win 7 on my Mac via Parallels.  ↩

Fountain for Cheaters

Fountain for Cheaters

Earlier today Brett Terpstra posted Cheaters, a “customizable cheat sheet system”. It’s easy to use, super helpful, and just all around awesome.

I had a little time this afternoon so I whipped up a Fountain syntax guide, pulled from the fountain.io syntax page. Here are links to the Fountain sheet and the modified CSS file. Follow Brett’s instructions to customize your own cheatsheet.

I plan on adding my SP-MMD syntax to my cheatsheet, as well as my still-in-development MultiMarkdown sildeshow presentation tool.

FYI, since I’m strictly an amateur, I make no guarantees that this will work as well for you as it does for me.

A huge thanks to Brett for this insanely useful tool.