For my work, producing videos, it’s incredibly important to keep my files and tasks organized. Managing multiple versions of sequences and shots across thousands of files, hundreds of gigabytes in size, can and will get unwieldy very quickly. The better organized I am from the start, the less likely I’ll be banging my head against my desk in the eleventh hour.
Here’s a brief overview of what I do and how I do it.
The Folder Structure
I’ve been using roughly the same folder structure for my projects for the better part of a decade now. Here’s what it looks like:
I have high-level folders for the key stages of production: pre-production, production, post-production, and final deliverables. Within each of those folders are subfolders corresponding to specific types of assets that will be gathered or created along the way.
It’s worth mentioning that this folder structure is just the starting point for each of my projects. Not every folder will be used on every project. And, for some projects, many additional folders will be added. For example, a project that includes vfx work (most of them) will have files and folders programmatically created for each vfx shot within the Comp Files, Plates, and Renders folders [1].
Launchbar
To create that folder structure, I run a Keyboard Maestro macro — from Launchbar — that gives me this little pop up:
I give the project a name, hit Return, and the new folder is created in my “Projects” folder in Dropbox.
As an aside, the Launchbar Action I run to activate the Keyboard Maestro macro is called “Planter” because I first began automating my folder structure creation with Brett Terpstra’s great, free application Planter, and I’m a big fan of maintaining muscle memory regardless of whether or not it makes any actual sense [2].
The Things Project
I’m sure you noticed the checkbox on the “New Project” dialog box. Yes, that does what you think it does. If checked (the default), it creates a new project in Things in my “Work” Area with the designated name of the project, and pre-populates it with a standard set of tasks. Again, this is just a starting point. Some tasks may not be required, and many more will likely be added. Regardless, after I hit Return on that dialog box, this is what shows up in Things.
The Tags
There’s one other trick I added to this setup a few years ago that I really like. When navigating through dozens of folders, often with very similar names, it’s easy to get lost. Something that helps me find what I’m looking for more quickly is a Hazel rule that looks through my folder structure and adds a macOS green tag to any folder that is not empty.
This way, after I’ve programmatically created a series of folders that will receive my yet-to-be-rendered vfx shots, I’ll more quickly be able to see which shots have been rendered and which have not.
It doesn’t tell me anything about what’s going on inside that folder, but I find it makes navigation a little quicker and easier, especially with a tired brain.
The Technical Bits
Alright, let’s get to the part with all the images and the scrolling.
The folder creation and the Things project creation are done with two separate Keyboard Maestro macros to attempt to keep things as tidy-ish as possible [3]. The folder creation macro calls the Things macro (if the box is checked) at the end of its steps.
The Folder Creation Macro

Click through to see the whole enchilada.
The Things Macro
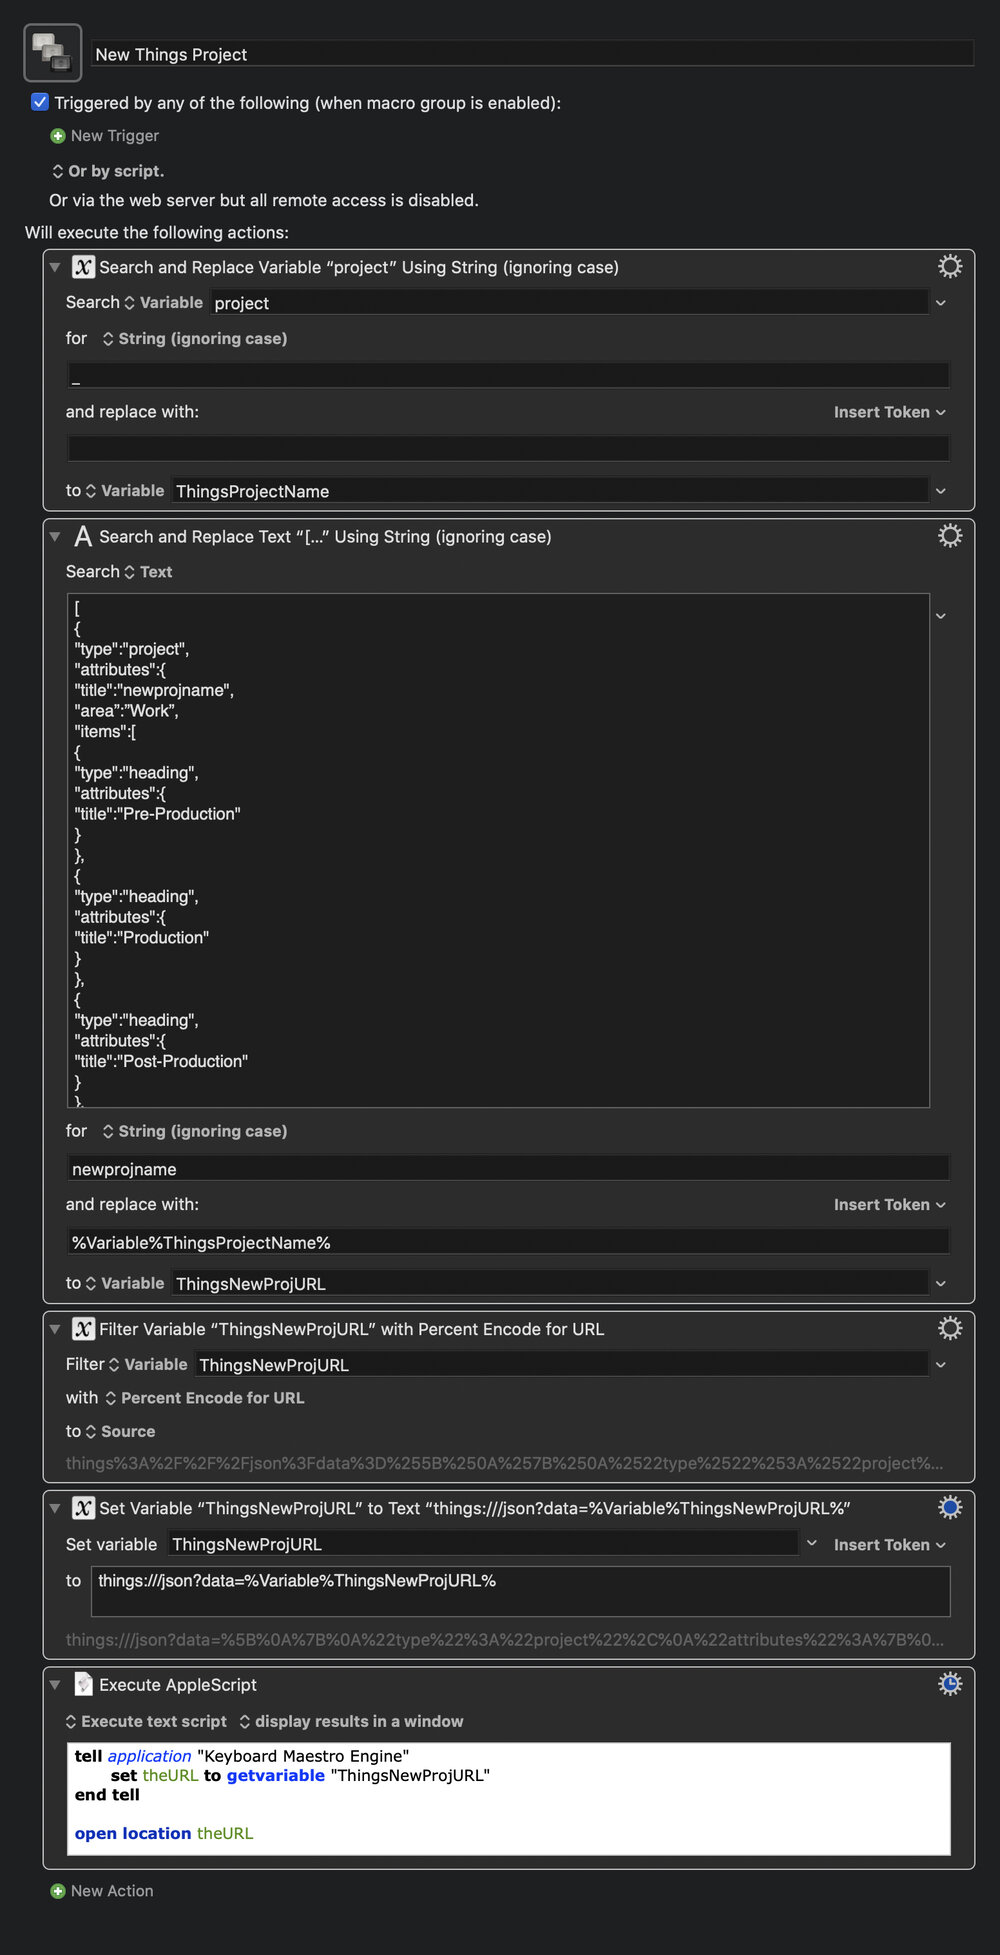
Click through to see the full image.
The “New Things Project” macro is built using Things’ JSON based commands, rather than the more limited URL Scheme commands. It’s much more flexible, faster to modify, and is the only way to access certain features like Headings.
If you’re curious, you can see the full code inside that second block of the macro here.
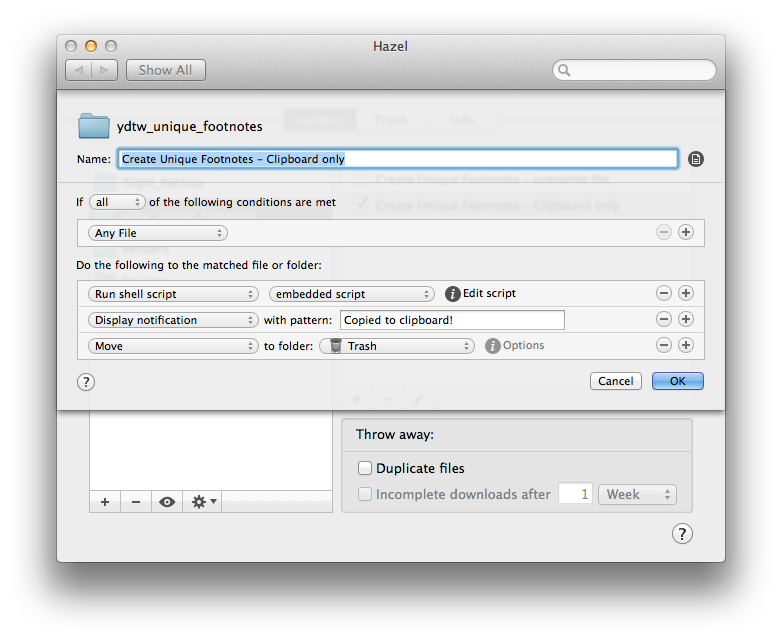
The Hazel Rule
The Hazel rule is fairly simple:
The AppleScript in the second Condition is:
set root_fol to theFile

tell application "Finder"
    set files_ to count files of entire contents of root_fol
end tell

if files_ is 0 then
    return false
else
    return true
end if
I honestly have no recollection of where I found this script on the internet. However, I can tell you with a fair amount of certainty that I did not write it.
This Hazel rule is running on my entire “Projects” folder, so any new folder that’s added will automatically be analyzed and tagged.
All That’s Left to Do Is Everything
So, that’s it. That’s how I begin work on every project. Once a project has a name, it gets a folder and a Things project. Then the actual work can begin. Hooray…
-
These files and folders are created by the project management tools inside Nuke Studio and that is absolutely a post for another time. Or maybe not because sheesh. ↩
-
See also: I use the abbreviation “ch” to launch Safari with Launchbar despite having switched from using Chrome as my primary browser probably 7 years ago. It’s fast and my hands are used to it, so I’m sticking with it. ↩
-
lol ↩